How to Use Cloudflare DDNS with Docker
In this guide, we'll walk you through setting up Cloudflare DDNS using Docker

Are you tired of dealing with dynamic IP addresses and want a reliable way to access your home server or services remotely? Cloudflare DDNS (Dynamic DNS) is a great solution!
In this guide, we'll walk you through setting up Cloudflare DDNS using Docker.
Step-by-Step Guide
Step 1: Create a Domain on Cloudflare:
- Sign up for a Cloudflare account if you don't already have one.
- Add your domain to Cloudflare and choose the free plan.
- Change your domain's name servers to Cloudflare's name servers.
Step 2: Log in to your Cloudflare account, navigate to API Token page: https://dash.cloudflare.com/profile/api-tokens
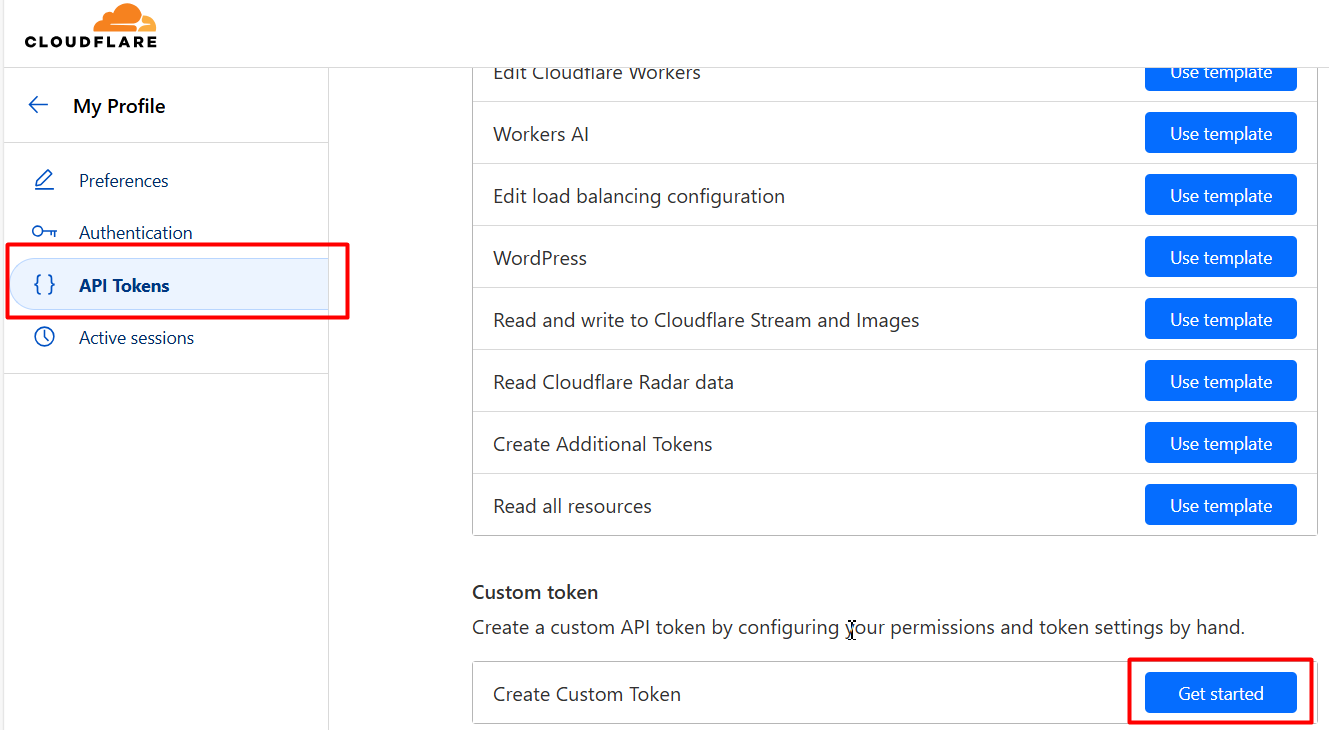
Step 3: Scroll down to the bottom of the page and click on "Get started" button in the Custom token section.
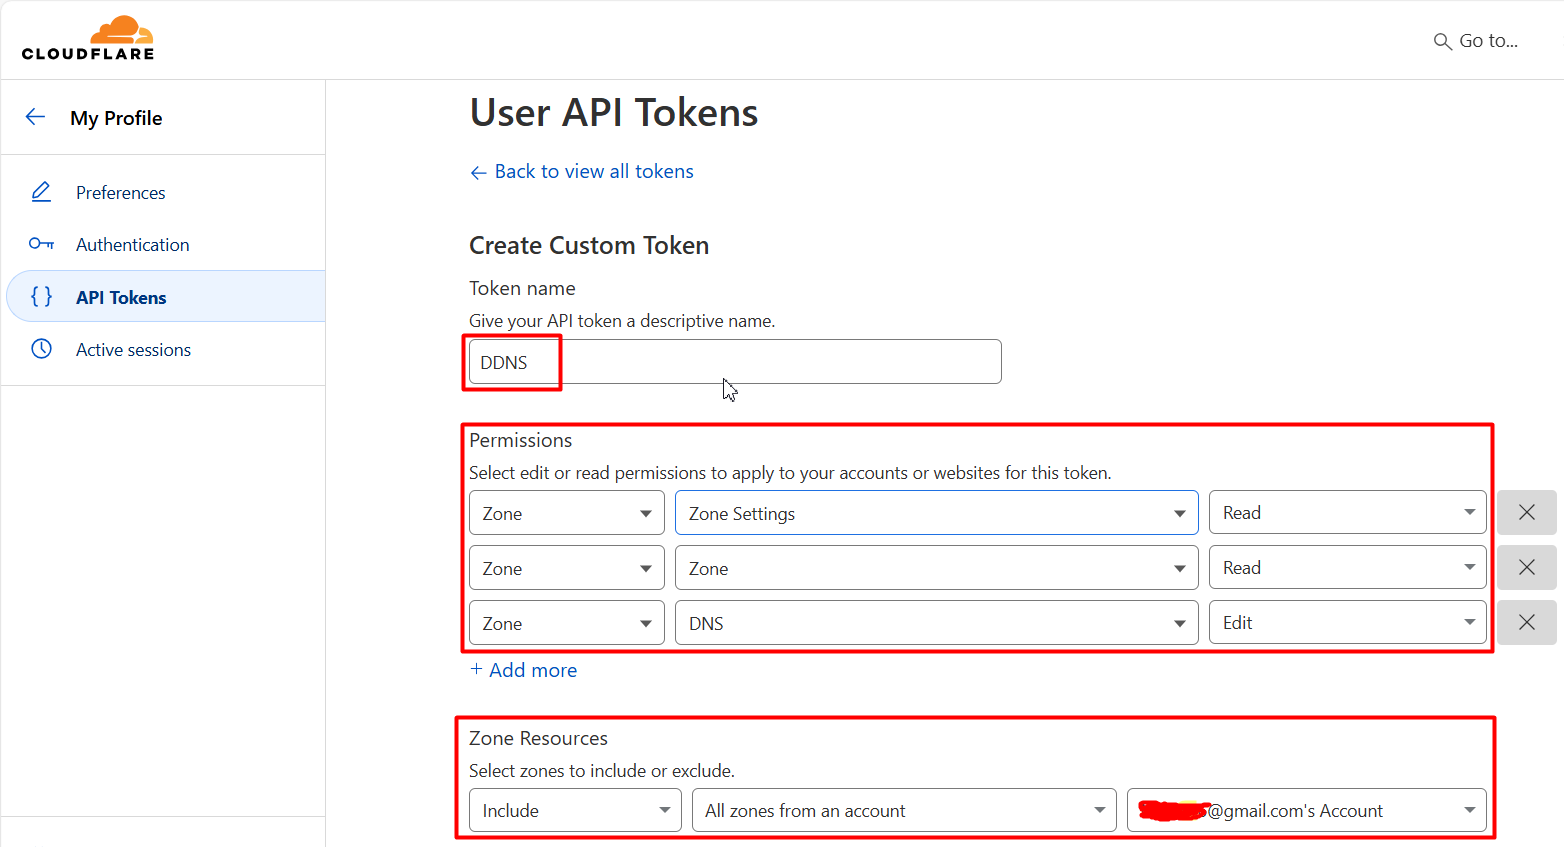
Step 4: Config the parameters as below, then click Continue to summary
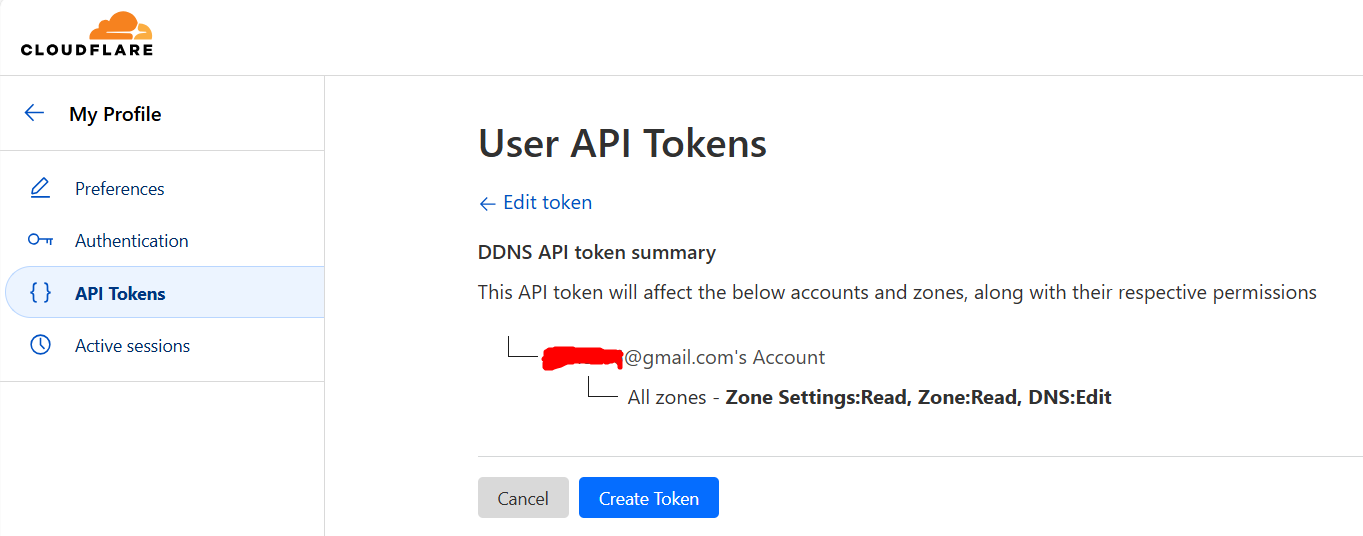
Step 5: Click on Create Token on the next screen, the Copy and Save the Token:
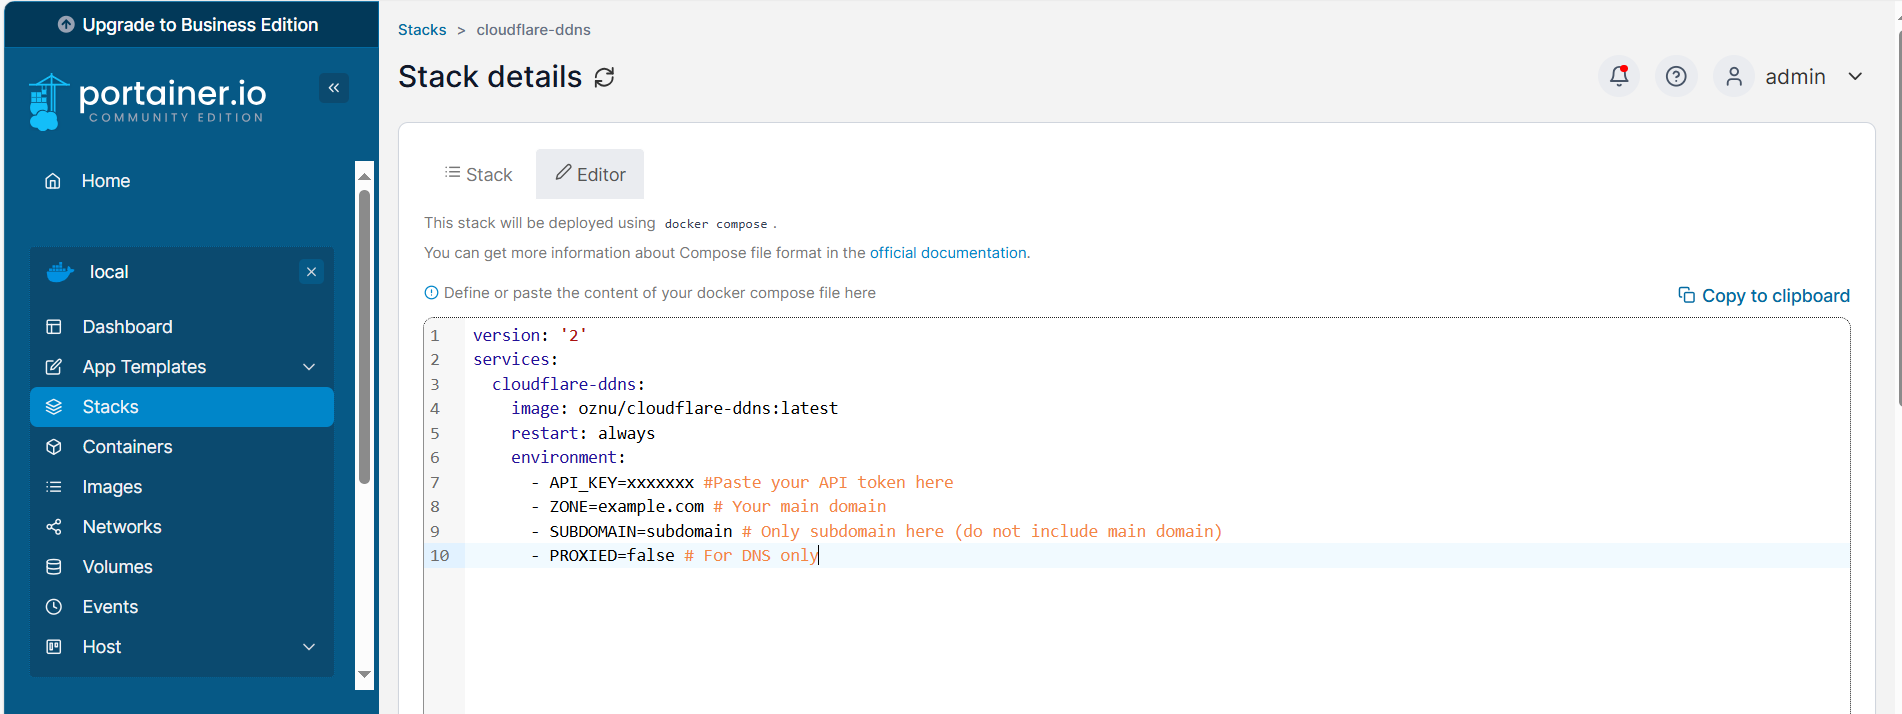
Step 6: Deploy the Cloudflare DDNS Docker Container using Portainer Stack or Docker Compose.
- Set PROXIED=false if you use DDNS for DNS only.
- Set PROXIED=true if you use DDNS for other services such as web...
version: '2'
services:
  cloudflare-ddns:
    image: oznu/cloudflare-ddns:latest
    restart: always
    environment:
      - API_KEY=xxxxxxx #Paste your API token here
      - ZONE=example.com # Your main domain
      - SUBDOMAIN=subdomain # Only subdomain here if any (do not include main domain)
      - PROXIED=false # False For DNS only; true for web
Step 7: Verify the Setup:
- Check the logs of the Docker container to ensure it's running and updating the DNS records every few minutes.
- You can view the logs with the command:
docker logs <container_id>.
Step 8: Access Your Services:
Use your domain name (e.g., your_subdomain.your_domain.com) instead of your dynamic IP address to access your home server or services.
Conclusion
Setting up Cloudflare DDNS with Docker is a straightforward process that can save you a lot of headaches with dynamic IP addresses. With this setup, you'll have a reliable way to access your home server or services from anywhere in the world.
Feel free to ask if you have any questions or need further assistance!


