Installing qBittorrent on openmediavault Using Docker Compose
This article goes through step-by-step to install qBittorrent on OpenMediaVault using Docker Compose, as well as some initial setting for it.


qBittorrent is a popular, open-source BitTorrent client that offers a clean interface and a wide range of features. It is designed to be a lightweight alternative to other BitTorrent clients while providing the same level of functionality. With qBittorrent, users can manage their torrent downloads efficiently, thanks to features like an integrated search engine, RSS feed support, and remote control via a web user interface. In this blog post, we will go through step-by-step to install qBittorrent on OpenMediaVault using Docker Compose, as well as some initial setting for it.
Step-by-Step Guide to Install qBittorrent on openmediavault Using Docker Compose
Prerequisites:
- openmediavault installed and running
- OpenMediaVault Extras installed. You can find the full guide to install omv-extras here.
Step 1: Prepare Your Environment
- Log in to openmediavault: Access your openmediavault web interface.
- Enable Docker Repo: Navigate to
System>omv-extrasand enable the Docker repository. ClickSaveand thenApply. - Install Docker and Docker Compose: Go to
System>Plugins, search fordockerandopenmediavault-compose, and install both plugins.
Step 2: Create a Docker Compose File
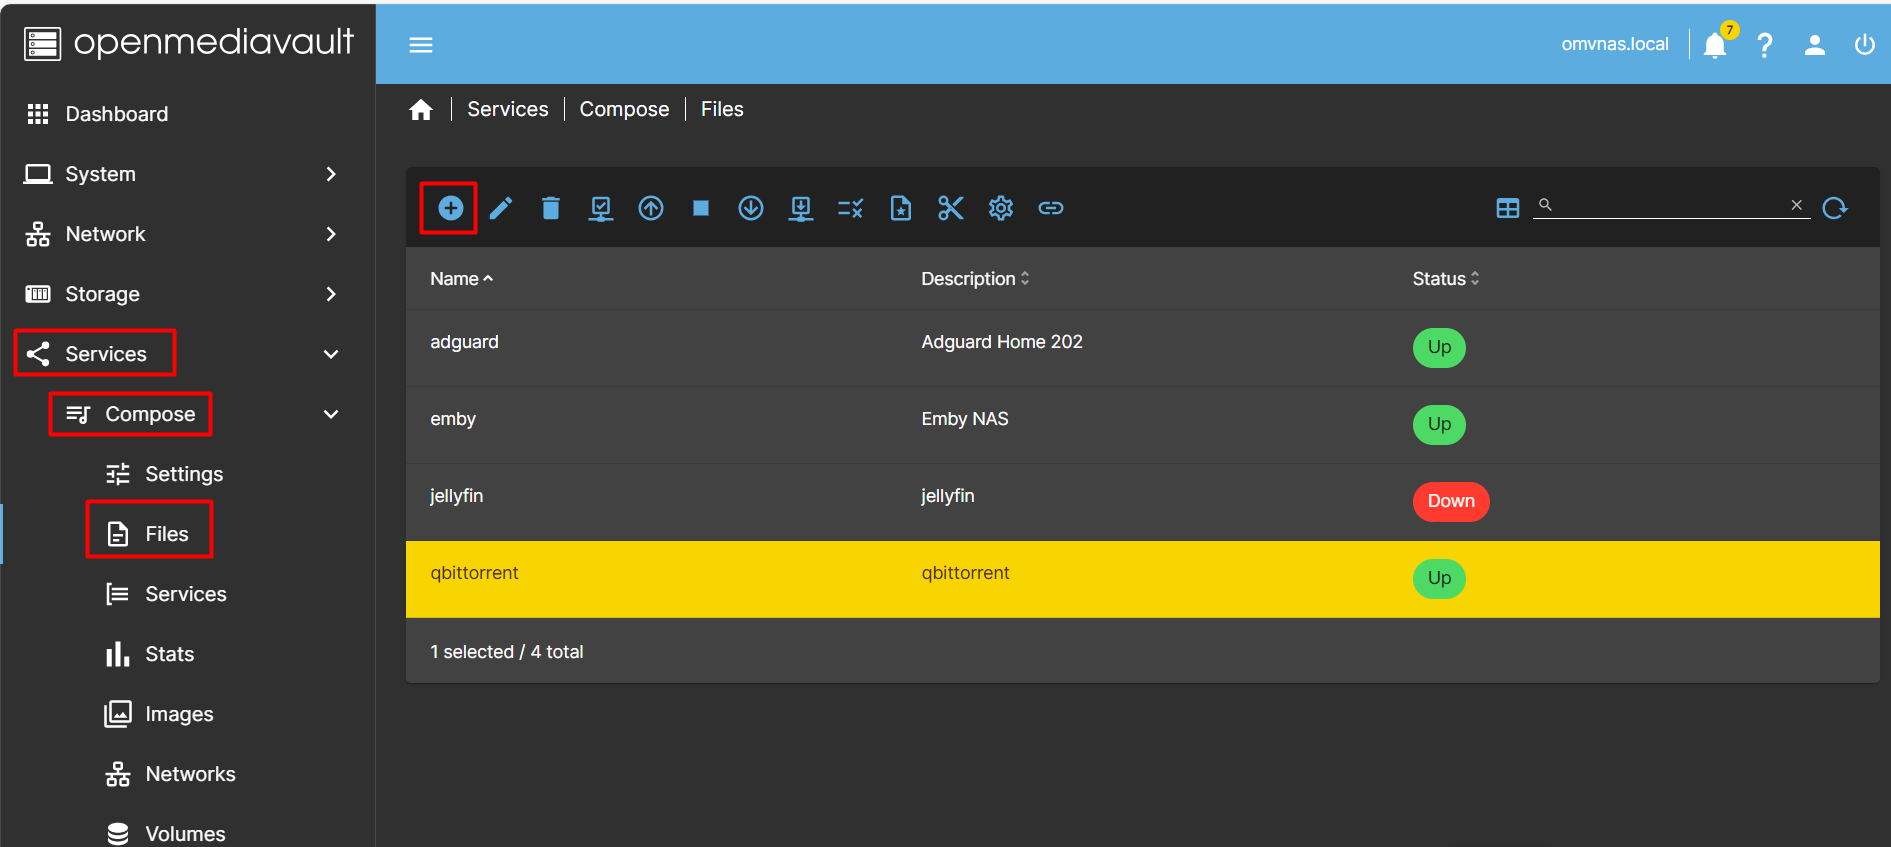
Go to Services -> Compose -> Files, then click New to create new docker-compose.yaml file for qBittorrent.
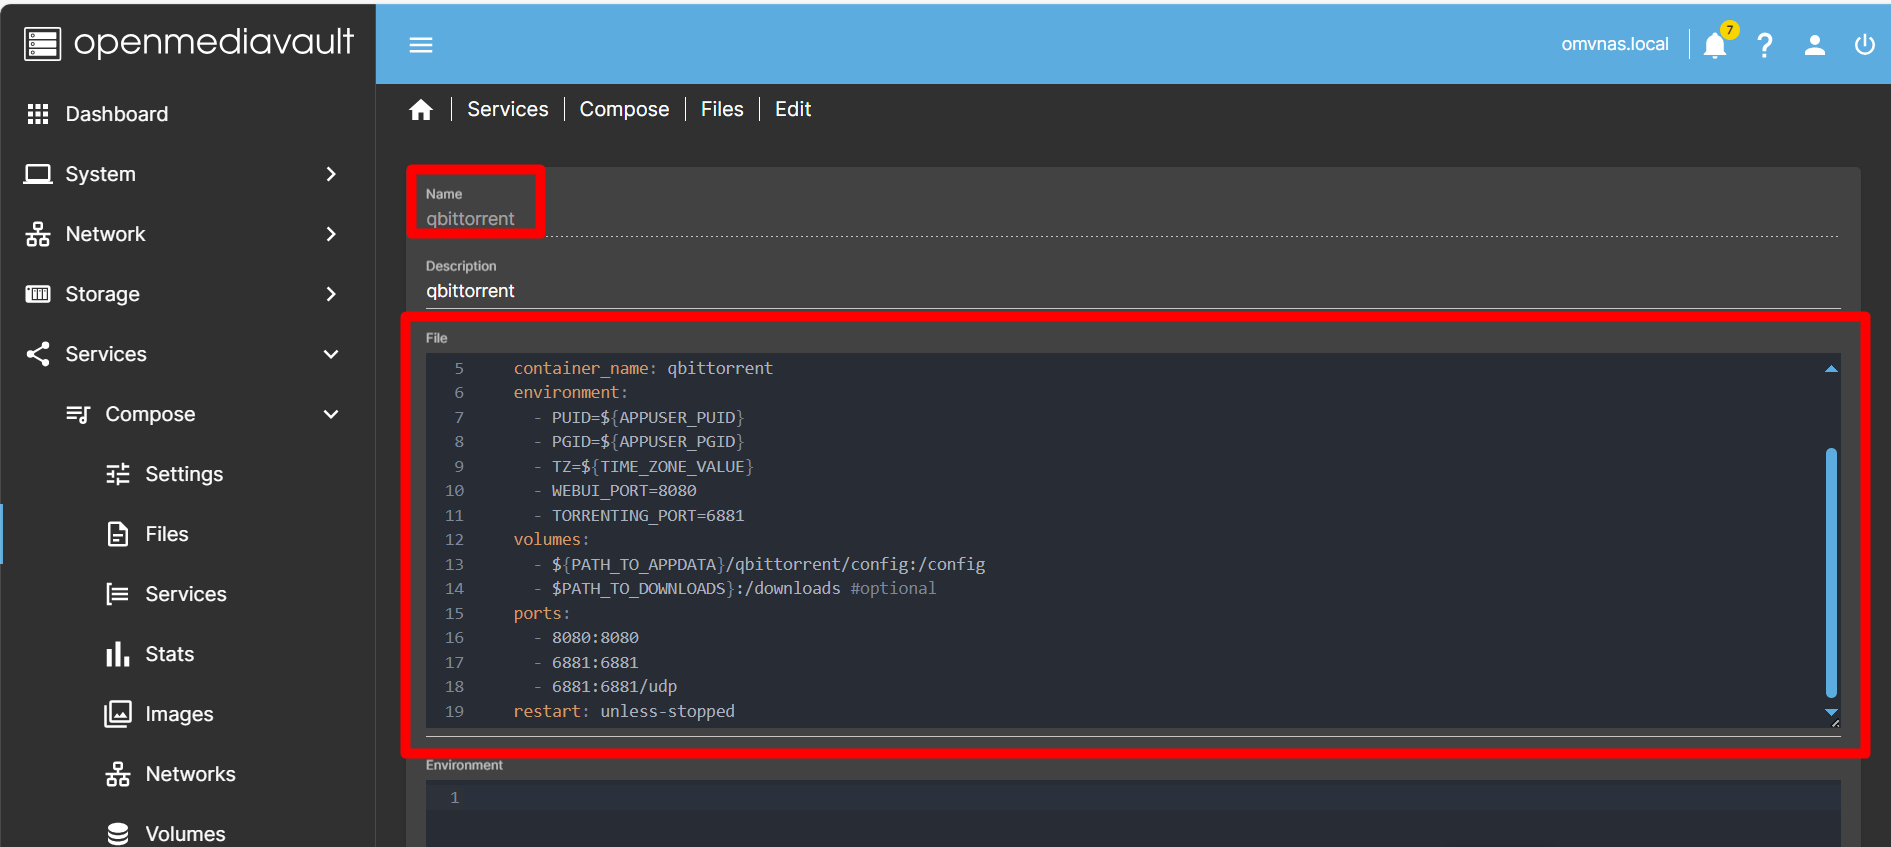
For me, I use the docker-compose content from linuxserver: https://hub.docker.com/r/linuxserver/qbittorrent
---
services:
  qbittorrent:
    image: lscr.io/linuxserver/qbittorrent:latest
    container_name: qbittorrent
    environment:
      - PUID=1000
      - PGID=1000
      - TZ=Etc/UTC
      - WEBUI_PORT=8080
      - TORRENTING_PORT=6881
    volumes:
      - /path/to/qbittorrent/appdata:/config
      - /path/to/downloads:/downloads #optional
    ports:
      - 8080:8080
      - 6881:6881
      - 6881:6881/udp
    restart: unless-stopped
Paste the above content to Remember to change the parameters according to your system. Then click Save.
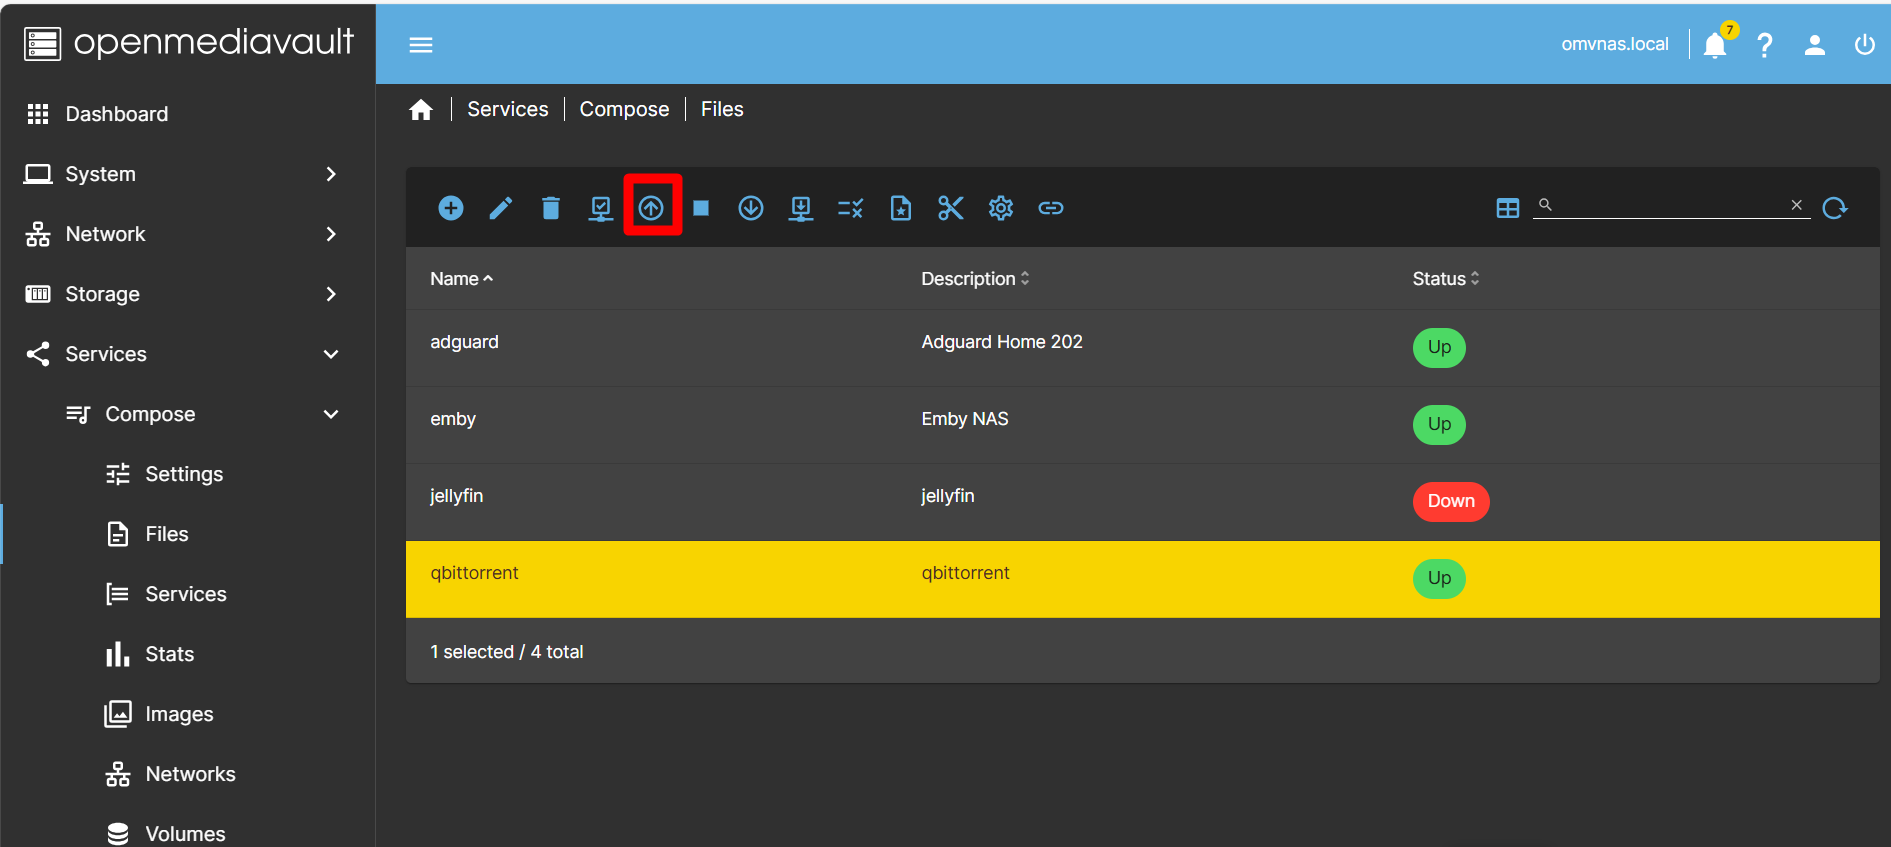
Step 3: Deploy the qBittorrent Container
Click "Up" button to pull the docker image and deploy the container. Wait for it's status change to "Up".
Step 4: Access the qBittorrent Web Interface
- Open Your Browser: Navigate to
http://<your-server-ip>:8080to access the qBittorrent web interface. - Login: The default username is
adminand the default password is automatically generated. You can get the password by SSH into OpenMediaVault and run the following command to read to qBittorrent container log and get the password there.
docker logs qbittorrent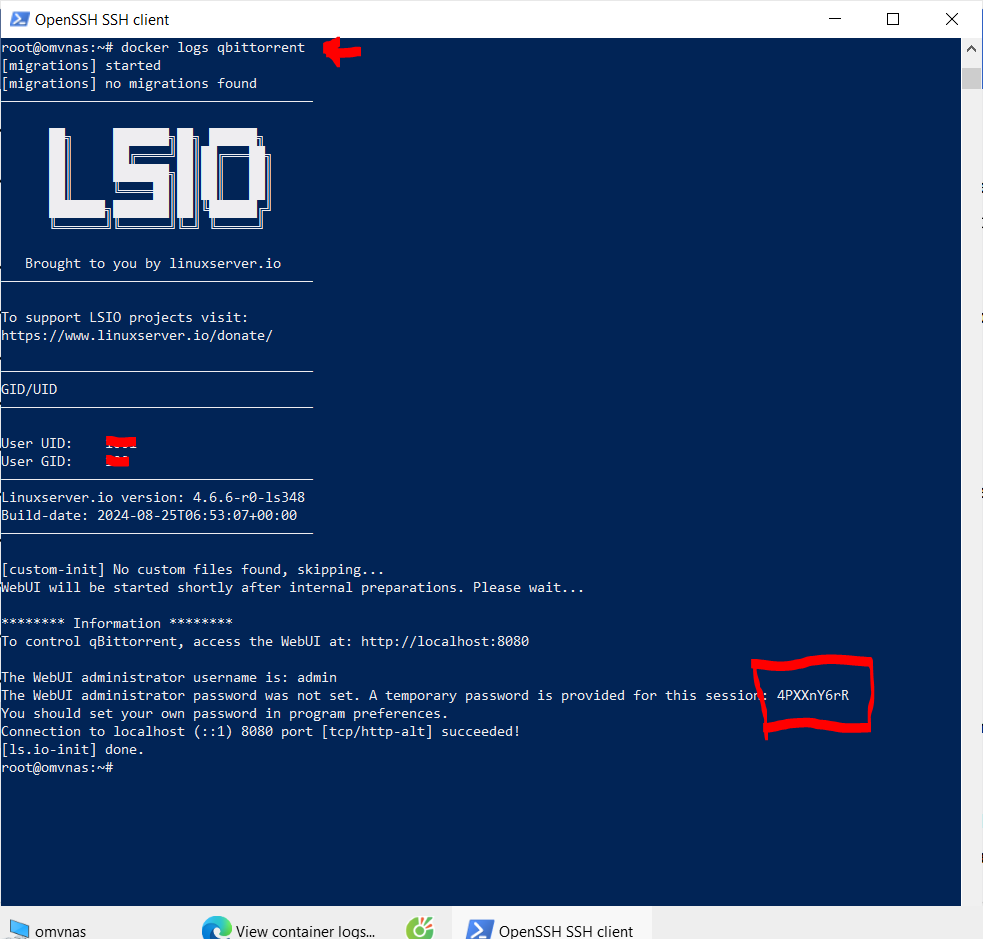
Make sure to change these credentials after your first login for security reasons.
Recommended First-Time Settings for qBittorrent
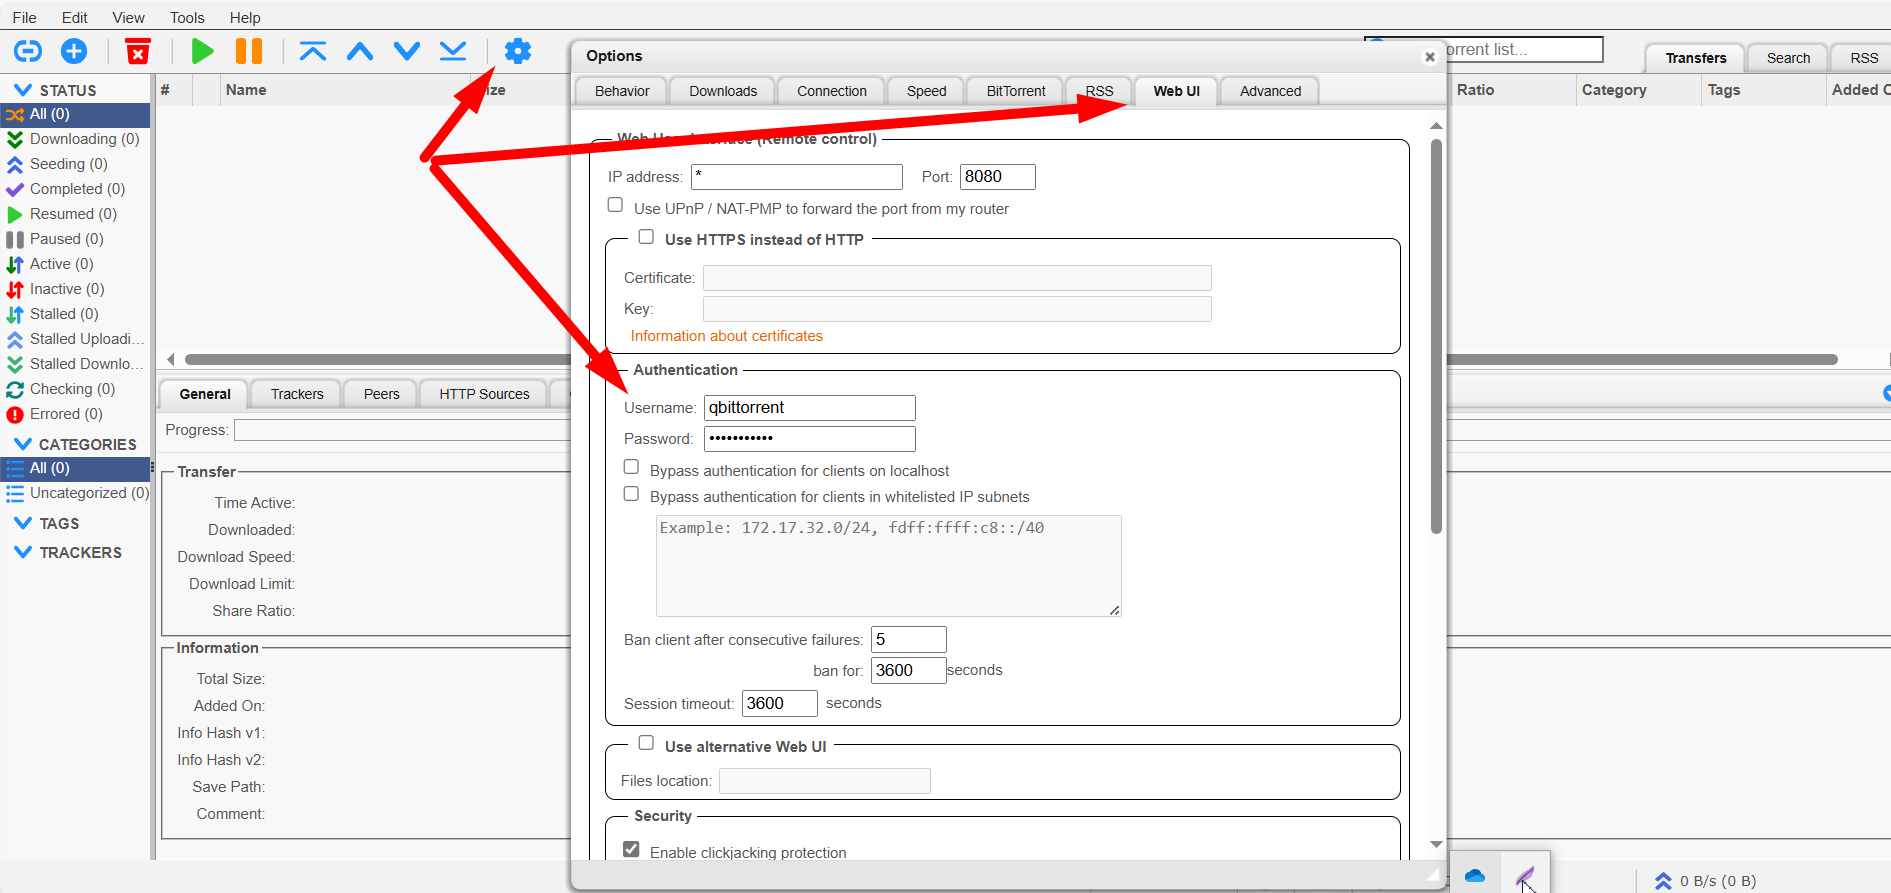
Change Default Credentials: Go to Options > Web UI and change the default username and password.
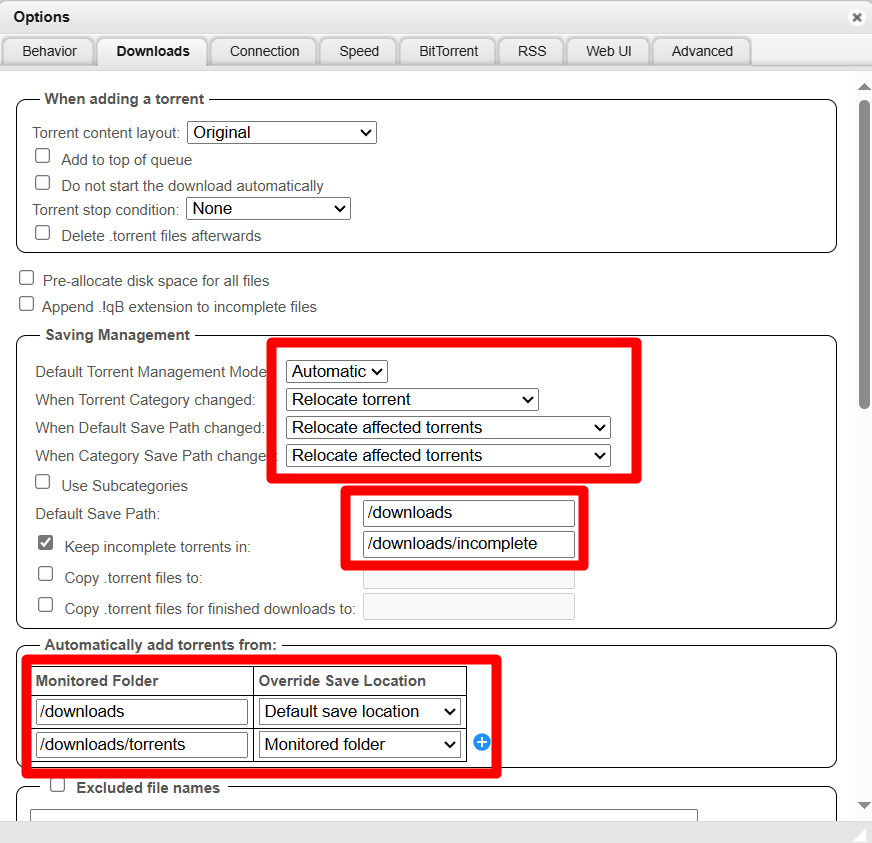
Set Download Locations: Configure your download locations under Downloads to ensure your files are saved in the correct directories. For me I also config other settings as below:
Config OpenTracker: udp://tracker.opentrackr.org:1337/announce

Configure Bandwidth Limits: Set appropriate upload and download speed limits under Speed to manage your network usage.
Enable IP Filtering: For added security, enable IP filtering under Connection.
By following these steps, you should have a fully functional qBittorrent setup on your openmediavault server using Docker Compose. Enjoy your efficient and powerful torrent management system!


