How to Install Proxmox Backup Server as a VM and backup to NAS
A detailed guide on how to install Proxmox Backup Server as a VM and backup to NAS


Setting up a Proxmox Backup Server (PBS) as a virtual machine (VM) within Proxmox Virtual Environment (PVE) is a great way to manage your backups efficiently. This guide will walk you through the process of installing PBS as a VM and configuring it to back up your Proxmox VMs and LXC containers to a Network Attached Storage (NAS).
Step 1: Prepare the Proxmox Backup Server ISO
- Download the ISO: First, download the Proxmox Backup Server ISO from the official Proxmox website.
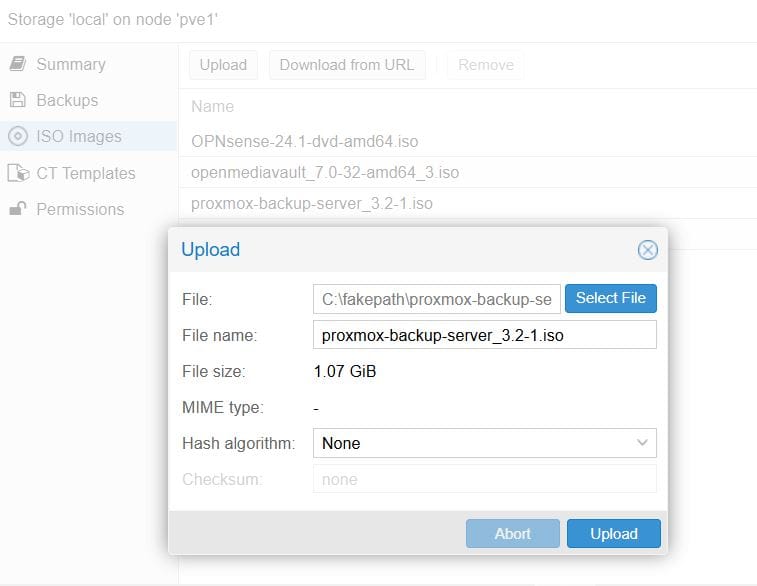
- Upload the ISO to Proxmox: Navigate to your Proxmox web interface, go to the storage section, and upload the ISO file.
Step 2: Create a Virtual Machine for Proxmox Backup Server
- Create a New VM: In the Proxmox web interface, click on “Create VM”.
- Configure VM Settings:
- Node: Select the node where you want to create the VM.
- VM ID: Assign a unique ID for the VM.
- Name: Give your VM a name, e.g.,
ProxmoxBackupServer. - Check
Start At Bootbox to make sure the PBS automatically start when the system boot.
- OS Configuration:
- ISO Image: Select the Proxmox Backup Server ISO you uploaded.
- Guest OS Type: Choose
LinuxandOther Linux 6.x or higher kernel.
- System Configuration: leave it as default
- Hard Disk:
- Bus/Device: Choose
VirtIO Block. - Storage: Select your storage location.
- Disk Size: Allocate sufficient disk space (e.g., 32GB or more).
- SSD Emulation: checked.
- Bus/Device: Choose
- CPU:
- Cores: Assign at least 2 cores.
- Type: Set to
hostfor better performance.
- Memory:
- RAM: Allocate at least 4GB.
- Ballooning Device: unchecked.
- Network:
- Model: Choose
VirtIO (paravirtualized).
- Model: Choose
Step 3: Install Proxmox Backup Server
- Start the VM: Boot the VM from the ISO.
- Follow the Installation Wizard: Complete the installation by setting the root password, email, time zone, and network settings.
- Access the Web Interface: Once installed, access the PBS web interface via
https://<PBS_IP>:8007.
Step 4: Add a CIFS for SMB mount and Configure NAS for Backup Storage in Proxmox Backup Server
Install CIFS Utils:
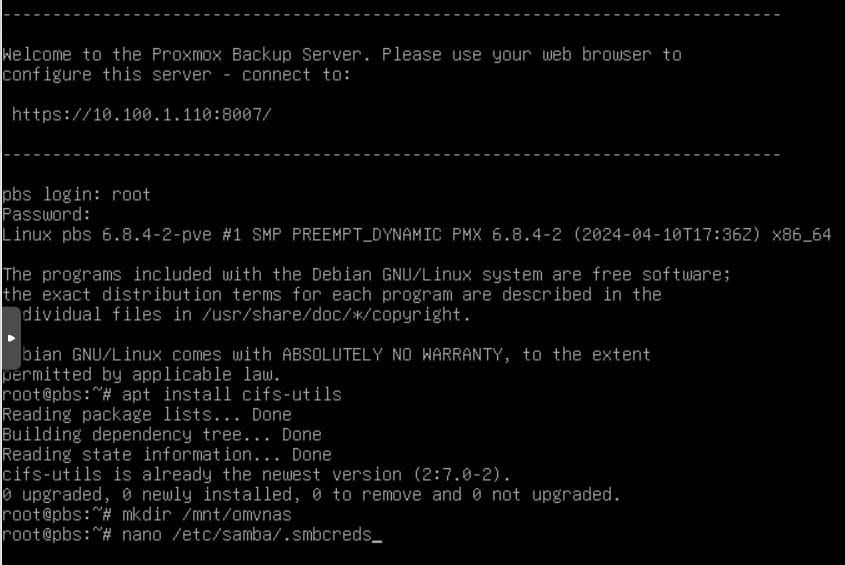
After PBS installation finished, login (or SSH) as root and install CIFS Utils:
apt install cifs-utils
Create a Mount Directory:
mkdir /mnt/omvnas
Add SMB credentials to mount NAS:
Create .smbcreds to store NAS login data:
nano /etc/samba/.smbcreds
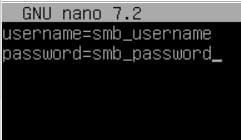
Put the username and password to the file and Save (Ctrl+O, Enter, Ctrl+X):
username=smb_username
password=smb_password
Change file permission to be read-only by root:
chmod 400 /etc/samba/.smbcreds
Mount the SMB Share:
Create shared folder on OMVNAS, then mount it to the /mnt/omvnas folder. Remember to replace //IP-OF-NAS/SHARE-NAME to your actual NAS shared folder:
mount -t cifs -o rw,vers=3.0,credentials=/etc/samba/.smbcreds,uid=34,gid=34 //IP-OF-NAS/SHARE-NAME /mnt/omvnas
Check if the shared folder is mounted successfully by make a new directory name "test" using the command in terminal, and check it appear in your NAS:
mkdir /mnt/omvnas/test
Make the Mount Persistent:
Edit the fstab file to automatically mount the folder when the PBS server boot:
nano /etc/fstab
Add this line to the fstab file and Save. Remember to replace //IP-OF-NAS/SHARE-NAME to your actual NAS shared folder:
//IP-OF-NAS/SHARE-NAME /mnt/omvnas cifs vers=3.0,credentials=/etc/samba/.smbcreds,uid=34,gid=34,defaults 0 0
These steps will ensure your SMB share is mounted and accessible in Proxmox Backup Server.
Step 5: Configure Proxmox Backup Server
- Initial Setup:
- Login: Use the root credentials to log in.
- Network Configuration: Ensure the network settings are correct.
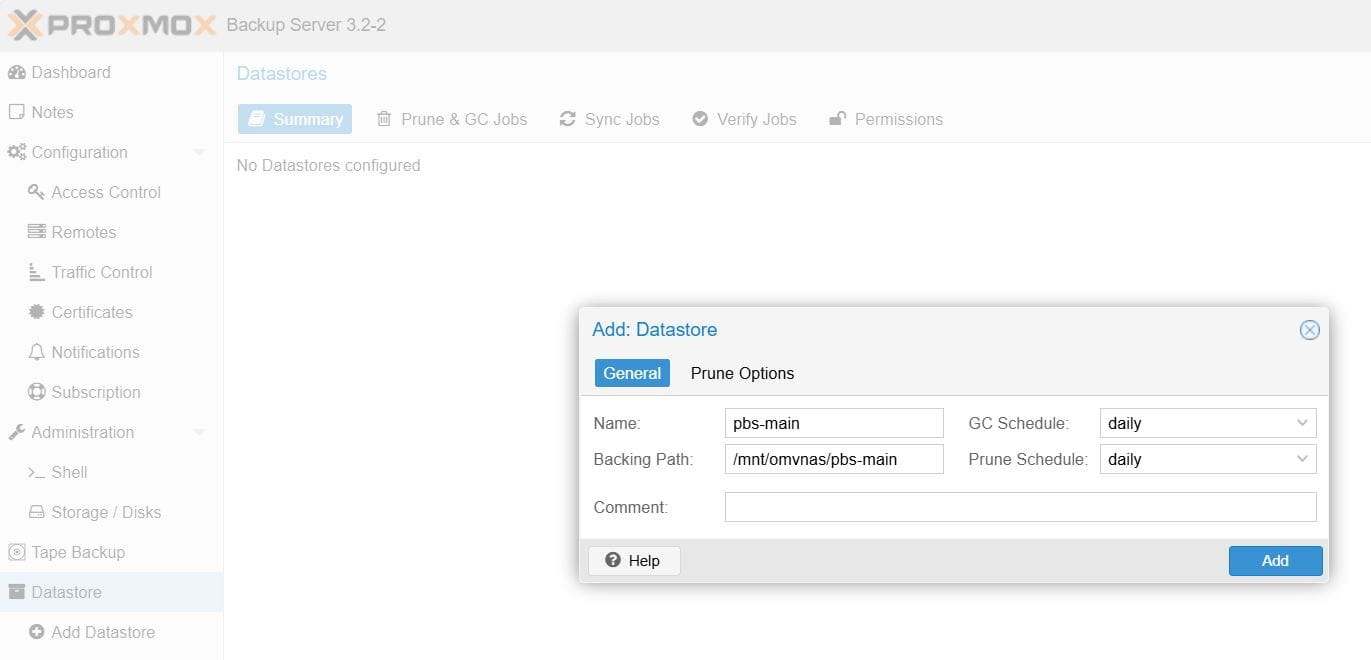
- Create a Datastore:
- Navigate to Datastore: In the PBS web interface, go to
Datastoreand create a new datastore. - Path: Specify the path where backups will be stored.
- Navigate to Datastore: In the PBS web interface, go to
Step 6: Add Proxmox Backup Server to Proxmox VE
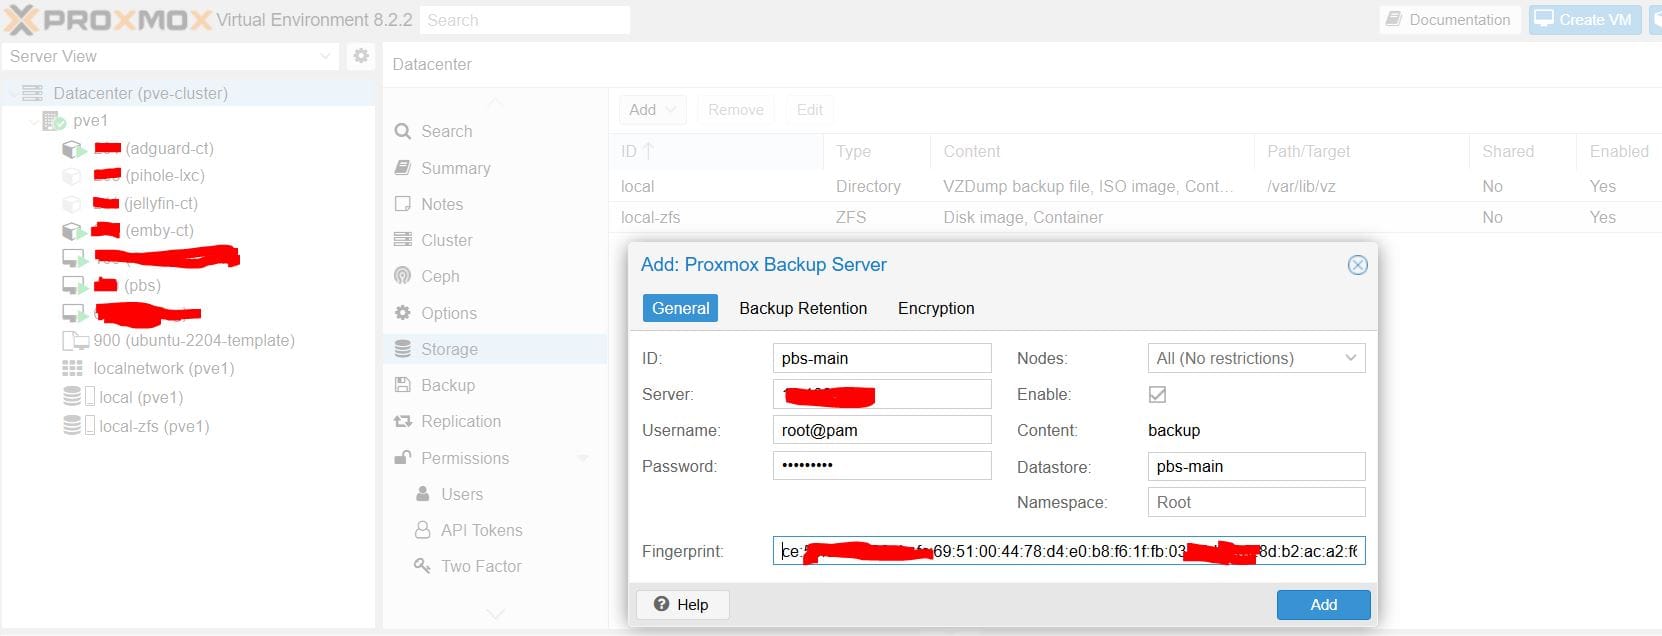
- Navigate to Datacenter: In the Proxmox web interface, go to
Datacenter>Storage. - Add Storage: Click on
Addand selectProxmox Backup Server. - Configuration: Enter the PBS ID
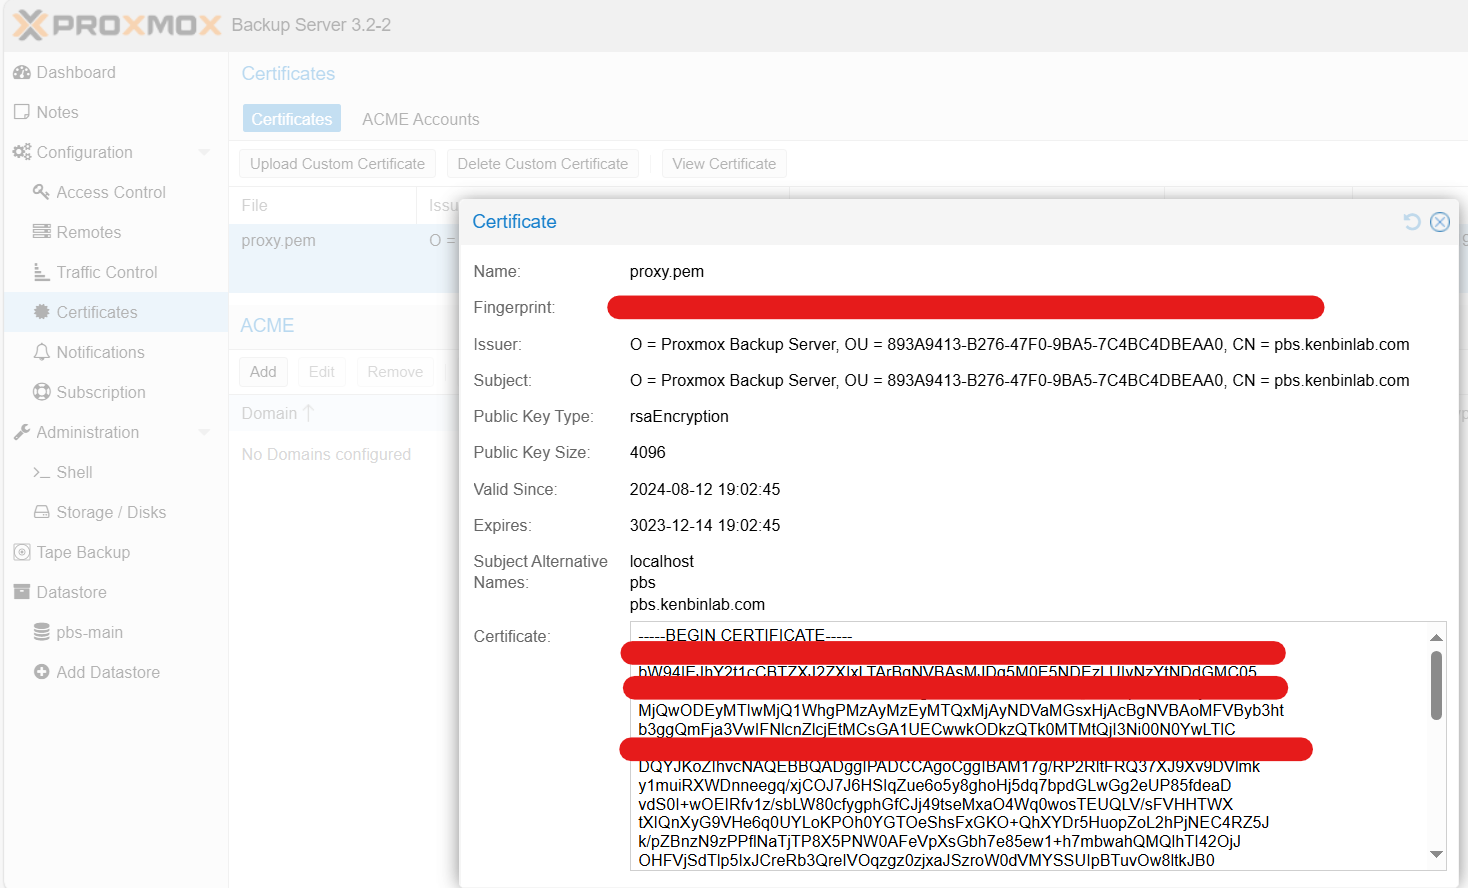
pbs-main, PBS IP , username (root@pam), password, and datastore namepbs-main. - Fingerprint: Paste the PBS fingerprint here (to get it: go to Proxmox Backup Server, under
Configuration -> Certificates -> View Certificate, copy the Fingerprint)
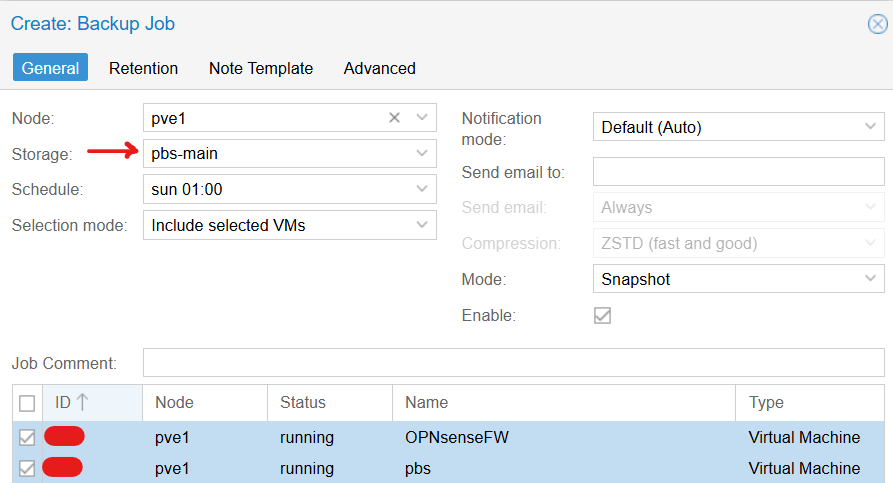
Step 7: Configure Backup Jobs
- Create Backup Jobs:
- Navigate to Datacenter: In the Proxmox web interface, go to
Datacenter>Backup. - Add a New Job: Click on
Addand configure the backup job. - Storage: choose the PBS storage created in the previous step:
pbs-main - Schedule: Set the schedule for the backups.
- Selection: Choose the VMs and LXC containers to back up.
- Navigate to Datacenter: In the Proxmox web interface, go to
Step 9: Verify and Monitor Backups
- Run a Test Backup: Manually trigger a backup job to ensure everything is working correctly.
- Monitor Backups: Use the PBS web interface to monitor backup status and logs.
By following these steps, you can efficiently set up a Proxmox Backup Server as a VM within Proxmox and configure it to back up your VMs and LXC containers to a NAS. This setup ensures that your data is securely backed up and easily recoverable in case of any issues.
Feel free to ask if you have any questions or need further assistance!


