Tag: Proxmox

  • How to Install Home Assistant on Proxmox

    How to Install Home Assistant on Proxmox

    Home Assistant is a powerful open-source platform for smart home automation. Running it on Proxmox VE, a robust virtualization environment, offers flexibility and efficiency. This guide will walk you through the process of setting up Home Assistant on Proxmox VE.

    1. Creating and Setting Up a Virtual Machine (VM)

    First, let’s create a new VM specifically for Home Assistant:

    • CPU: Allocate at least 2 cores.
    • RAM: Assign a minimum of 2GB.
    • Storage: Allocate at least 32GB of storage.
    • Network: Use the default network settings.

    Steps:

    Log in to your Proxmox VE web interface. Click on “Create VM” in the top right corner and fill in the VM details (e.g., VM ID, Name).

    On the OS tab, choose “Do not use any media“.

    On the System tab, choose OVMF (UEFI) for the BIOS, local-lvm for EFI Storage and Uncheck the Pre-Enroll keys.

    On the Disks tab, delete the default one:

    No disk for the Home Assistant VM

    Configure the settings of CPU to 2 cores, and Memory to 2048 MB as recommended.

    Under the “Network” tab, choose vmbr0 (depend on your network system).

    Then click Next, and click Finish.

    2. Download Home Assistant OS image and attach to HomeAssistant VM

    First, download the Home Assistant OS image to your Proxmox server:

    Go to the Home Assistant OS image from the official Home Assistant website. Right click on the KVM/Proxmox and Copy link.

    In the Proxmox web interface, click on the pve and open Shell, then type in wget <space> <paste copied link>, then hit Enter.

    wget https://github.com/home-assistant/operating-system/releases/download/13.2/haos_ova-13.2.qcow2.xz

    Wait a litte time for the downloading to finish. After that, type “ls” to list the file. Use your mouse to select and copy filename (haos_ova-13.2.qcow2.xz). After that, run this command to unzip it:

    unxz haos_ova-13.2.qcow2.xz

    Wait a moment for the command completed and list the file using “ls” command again, you will see the file haos_ova-13.2.qcow2.

    Now import the qcow2 image to Home Assistant VM as a disk using the command: qm importdisk <HA VM id> haos_ova-13.2.qcow2 local-lvm

    qm importdisk 104 haos_ova-13.2.qcow2 local-lvm

    Wait for the command finish, head back to Proxmox interface and you will see Unused Disk 0 under Hardware tab of the Home Assistant VM.

    Click on Edit button, and because my disk is a SSD so I check on Discard check box, if you run a a HDD then just leave it unchecked.

    Then click Add, and this will create a Hard Disk (scsi0)

    3. Configuring the VM for Home Assistant

    Now, let’s configure the VM to ensure compatibility with Home Assistant:

    Head to Option tab, double click on the “Boot Order” to open it, uncheck ide2 cdrom, net0, and check scsi0 disk the prioritize the Home Assistant OS disk to boot from. Then click OK to save setting.

    Under “Options”, enable “QEMU Guest Agent”.

    4. Installing Home Assistant OS on Proxmox

    With the VM configured, it’s time to install Home Assistant OS. Start the VM and open the console. Wait for Home Assistant OS installtion finish and you can see IP and port to access Home Assistant on the screen.

    5. Accessing and Setting Up Home Assistant

    Once the installation is complete, access the Home Assistant UI by open a web browser and navigate to http://<your_vm_ip>:8123. You may need to wait about 20 minutes for preparing Home Assistant.

    After the preparing process finish, now you can complete the initial setup by click on “Create My Smart Home” button to start creating an account and configuring your home.

    You also may need to secure your Home Assistant instance by setting up SSL and enabling two-factor authentication.

    6. Additional Tips

    To optimize your Home Assistant setup, consider the following tips:

    • Automated Backups: Set up automated backups to ensure your data is safe.
    • Adjusting VM Resources: Monitor and adjust the VM resources as needed for optimal performance.
    • Adding Integrations: Explore and add integrations for various smart devices to enhance your smart home experience.

    Conclusion

    Running Home Assistant on Proxmox VE provides a flexible and efficient way to manage your smart home. With this setup, you can easily scale resources and take advantage of Proxmox’s powerful features. For more advanced configurations, check out the Home Assistant documentation and the Proxmox VE wiki.

    I hope this helps! If you have any questions or need further assistance, feel free to ask.

  • Installing Ubuntu Server VM on Proxmox: A Step-by-Step Guide

    Installing Ubuntu Server VM on Proxmox: A Step-by-Step Guide

    Setting up a virtual machine (VM) running Ubuntu Server on Proxmox VE can transform your homelab into a versatile and efficient environment for various applications. Proxmox VE is a powerful open-source virtualization platform that combines KVM for virtual machines and LXC for containers. This guide will walk you through the process of installing Ubuntu Server on a Proxmox VM, covering everything from initial setup to post-installation configuration.
    Why Use Proxmox VE and Ubuntu Server?

    Proxmox VE:

    • Flexible Virtualization: Supports both KVM for full virtualization and LXC for lightweight container-based virtualization.
    • Easy Management: Provides a web-based interface for easy management of your virtual environment.
    • Scalable: Suitable for both small home labs and large production environments.

    Ubuntu Server:

    • Stability and Support: Offers a stable and well-supported server operating system.
    • Ease of Use: Known for its user-friendly setup and strong community support.
    • Versatility: Ideal for a wide range of applications from web hosting to development environments.

    Prerequisites

    Before you begin, ensure you have the following:

    1. Proxmox VE Installed: Ensure Proxmox VE is installed and running on your server. If you need to install it, follow the Proxmox installation guide.
    2. Ubuntu Server ISO Image: Download the latest Ubuntu Server ISO from the official Ubuntu website.
    3. Storage Space: Ensure you have enough storage available on your Proxmox host for the VM and its data.
    4. Network Configuration: Make sure your Proxmox host is connected to the network and has internet access for downloading updates and packages.

    Step-by-Step Installation Guide

    1. Upload the Ubuntu Server ISO to Proxmox

    1. Access Proxmox Web Interface:
      • Open your web browser and navigate to the Proxmox VE web interface. This is typically accessible at https://<your-proxmox-ip>:8006.
    2. Login:
      • Enter your Proxmox username and password to log in.
    3. Upload the ISO:
      • Go to the “Datacenter” view in the left-hand menu.
      • Select your Proxmox node and then click on the “Local” storage under “Storage” in the left-hand menu.
      • Click the “Content” tab and then click “Upload.”
      • Choose “ISO Image” as the type, browse to the Ubuntu Server ISO file you downloaded, and upload it.

    2. Create a New Virtual Machine

    1. Start the VM Creation Wizard:
      • Click on “Create VM” in the top right corner of the Proxmox web interface.
    2. Configure VM Settings:
      • General Tab:
        • Node: Select the Proxmox node where you want to create the VM.
        • VM ID: Proxmox will assign a default ID, but you can change it if needed.
        • Name: Give your VM a meaningful name (e.g., “Ubuntu-Server”).
      • OS Tab:
        • ISO Image: Select the Ubuntu Server ISO image you uploaded earlier.
        • Guest OS Type: Choose “Linux” and “5.x/6.x/7.x/8.x” as the version, which is suitable for Ubuntu Server.
      • System Tab:
        • BIOS: Choose “OVMF (UEFI)” or “SeaBIOS” depending on your preference. “SeaBIOS” is generally suitable for most setups.
        • Machine: Select “i440fx” or “q35” (use “i440fx” for compatibility).
        • Qemu Agent: Enabled.
      • Disks Tab:
        • Bus/Device: Choose “SCSI” or “IDE” for the disk bus. “SCSI” is recommended for better performance.
        • Disk Size: Allocate sufficient disk space for your needs (e.g., 32 GB).
        • Discard: enable this option if you use SSD.
        • SSD Emulation: enable this option if you use SSD.
      • CPU Tab:
        • Sockets: Allocate the number of CPU sockets (e.g., 1).
        • Cores: Specify the number of cores per socket (e.g., 2).
      • Memory Tab:
        • Memory Size: Allocate RAM for the VM (e.g., 2048 MB).
      • Network Tab:
        • Model: Choose “virtio” for better performance.
        • Bridge: Select the network bridge (e.g., “vmbr0”) to connect the VM to your network.
    3. Confirm and Create VM: Review your settings and click “Finish” to create the VM.

    3. Install Ubuntu Server on the VM

    Start the VM:

      • Select your newly created VM from the Proxmox web interface.
      • Click the “Start” button to boot up the VM.

    Open the Console: Click on the “Console” tab to access the VM’s display and interact with it.

    Begin Installation: The VM should boot from the Ubuntu Server ISO. Follow the on-screen instructions to start the installation process.

    Choose Language and Keyboard Layout: Select your preferred language and keyboard layout.

    Network Configuration:

      • Automatic: The installer will automatically configure the network.
      • Manual: If you need static IP settings, choose “Manual” and enter your network details.

    Configure Storage: Choose “Guided – Use Entire Disk” to let Ubuntu automatically partition the disk. Remember to adjust the ubuntu-lv line as below to make sure that Ubuntu Server will be installed into the entire disk.

    Set Up User: Create a user account and set a password.

    Install Updates and Software: Choose to install OpenSSH server.

    Install GRUB: When prompted, install the GRUB boot loader to the disk to enable the system to boot into Ubuntu Server.

    Complete Installation: Once installation is complete, the VM will prompt you to remove the ISO image and reboot. Do so, and your VM will boot into Ubuntu Server. On the first boot, remember to leave the system finish cloud-init initiating.

    Complete installation of Ubuntu Server 24.04 LTS on Proxmox

    4. Post-Installation Configuration

    Log in to your newly installed Ubuntu Server VM using the credentials you set up during installation. Then first update the system after installation:

    sudo apt update && sudo apt dist-upgrade

    Install QEMU Guest Agent:

    sudo apt install qemu-guest-agent

    Check QEMU Guest Agent installed:

    systemctl status qemu-guest-agent.service

    Start QEMU Guest Agent service:

    sudo systemctl start qemu-guest-agent.service

    Turn the system off:

    sudo poweroff

    Check the QEMU Guest Agent of the VM in enabled in Proxmox (if not -> enable it). Then start the VM, check the QEMU Guest Agent started successfully:

    systemctl status qemu-guest-agent.service

    Conclusion

    You have successfully created and installed an Ubuntu Server VM on Proxmox VE. Your VM is now ready for further configuration and deployment of applications. Proxmox VE’s powerful management features will help you efficiently manage and scale your virtual environment, while Ubuntu Server provides a stable and versatile platform for your server needs.

    If you encounter any issues or need further assistance, both the Proxmox and Ubuntu communities offer extensive resources and support. Enjoy your new virtual server and the endless possibilities it brings to your homelab!

  • How to Install Proxmox Backup Server as a VM and backup to NAS

    Setting up a Proxmox Backup Server (PBS) as a virtual machine (VM) within Proxmox Virtual Environment (PVE) is a great way to manage your backups efficiently. This guide will walk you through the process of installing PBS as a VM and configuring it to back up your Proxmox VMs and LXC containers to a Network Attached Storage (NAS).

    Step 1: Prepare the Proxmox Backup Server ISO

    1. Download the ISO: First, download the Proxmox Backup Server ISO from the official Proxmox website.
    2. Upload the ISO to Proxmox: Navigate to your Proxmox web interface, go to the storage section, and upload the ISO file.
    Upload the Proxmox Backup Server ISO image to the Proxmox host

    Step 2: Create a Virtual Machine for Proxmox Backup Server

    1. Create a New VM: In the Proxmox web interface, click on “Create VM”.
    2. Configure VM Settings:
      • Node: Select the node where you want to create the VM.
      • VM ID: Assign a unique ID for the VM.
      • Name: Give your VM a name, e.g., ProxmoxBackupServer.
      • Check Start At Boot box to make sure the PBS automatically start when the system boot.
    3. OS Configuration:
      • ISO Image: Select the Proxmox Backup Server ISO you uploaded.
      • Guest OS Type: Choose Linux and Other Linux 6.x or higher kernel.
    4. System Configuration: leave it as default
    5. Hard Disk:
      • Bus/Device: Choose VirtIO Block.
      • Storage: Select your storage location.
      • Disk Size: Allocate sufficient disk space (e.g., 32GB or more).
      • SSD Emulation: checked.
    6. CPU:
      • Cores: Assign at least 2 cores.
      • Type: Set to host for better performance.
    7. Memory:
      • RAM: Allocate at least 4GB.
      • Ballooning Device: unchecked.
    8. Network:
      • Model: Choose VirtIO (paravirtualized).

    Step 3: Install Proxmox Backup Server

    1. Start the VM: Boot the VM from the ISO.
    2. Follow the Installation Wizard: Complete the installation by setting the root password, email, time zone, and network settings.
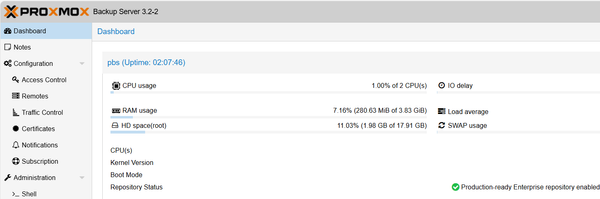
    3. Access the Web Interface: Once installed, access the PBS web interface via https://<PBS_IP>:8007.

    Step 4: Add a CIFS for SMB mount and Configure NAS for Backup Storage in Proxmox Backup Server

    Install CIFS Utils:

    After PBS installation finished, login (or SSH) as root and install CIFS Utils:

    apt install cifs-utils

    Create a Mount Directory:

    mkdir /mnt/omvnas

    Add SMB credentials to mount NAS:

    Create .smbcreds to store NAS login data:

    nano /etc/samba/.smbcreds

    Put the username and password to the file and Save (Ctrl+O, Enter, Ctrl+X):

    username=smb_usernamepassword=smb_password

    Change file permission to be read-only by root:

    chmod 400 /etc/samba/.smbcreds

    Mount the SMB Share:

    Create shared folder on OMVNAS, then mount it to the /mnt/omvnas folder. Remember to replace //IP-OF-NAS/SHARE-NAME to your actual NAS shared folder:

    mount -t cifs -o rw,vers=3.0,credentials=/etc/samba/.smbcreds,uid=34,gid=34 //IP-OF-NAS/SHARE-NAME /mnt/omvnas
    Step-by-Step Guide to Install OpenMediaVault on Proxmox and Enabling SMB Share
    A comprehensive guide for installing OpenMediaVault on Proxmox and setting up an SMB share for easy file sharing across your network


    Check if the shared folder is mounted successfully by make a new directory name “test” using the command in terminal, and check it appear in your NAS:

    mkdir /mnt/omvnas/test

    Make the Mount Persistent:

    Edit the fstab file to automatically mount the folder when the PBS server boot:

    nano /etc/fstab

    Add this line to the fstab file and Save. Remember to replace //IP-OF-NAS/SHARE-NAME to your actual NAS shared folder:

    //IP-OF-NAS/SHARE-NAME /mnt/omvnas cifs vers=3.0,credentials=/etc/samba/.smbcreds,uid=34,gid=34,defaults 0 0

    These steps will ensure your SMB share is mounted and accessible in Proxmox Backup Server.

    Step 5: Configure Proxmox Backup Server

    1. Initial Setup:
      • Login: Use the root credentials to log in.
      • Network Configuration: Ensure the network settings are correct.
    2. Create a Datastore:
      • Navigate to Datastore: In the PBS web interface, go to Datastore and create a new datastore.
      • Path: Specify the path where backups will be stored.

    Step 6: Add Proxmox Backup Server to Proxmox VE

    Add Storage in PVE
      • Navigate to Datacenter: In the Proxmox web interface, go to Datacenter > Storage.
      • Add Storage: Click on Add and select Proxmox Backup Server.
      • Configuration: Enter the PBS ID pbs-main, PBS IP , username (root@pam), password, and datastore namepbs-main.
      • Fingerprint: Paste the PBS fingerprint here (to get it: go to Proxmox Backup Server, under Configuration -> Certificates -> View Certificate , copy the Fingerprint)
    Copy the Fingerprint of Proxmox Backup Server

    Step 7: Configure Backup Jobs

    1. Create Backup Jobs:
      • Navigate to Datacenter: In the Proxmox web interface, go to Datacenter > Backup.
      • Add a New Job: Click on Add and configure the backup job.
      • Storage: choose the PBS storage created in the previous step: pbs-main
      • Schedule: Set the schedule for the backups.
      • Selection: Choose the VMs and LXC containers to back up.

    Step 9: Verify and Monitor Backups

    1. Run a Test Backup: Manually trigger a backup job to ensure everything is working correctly.
    2. Monitor Backups: Use the PBS web interface to monitor backup status and logs.

    By following these steps, you can efficiently set up a Proxmox Backup Server as a VM within Proxmox and configure it to back up your VMs and LXC containers to a NAS. This setup ensures that your data is securely backed up and easily recoverable in case of any issues.

    Feel free to ask if you have any questions or need further assistance!

  • How to delete a PVE Node in 2-Node Proxmox Cluster

    How to delete a PVE Node in 2-Node Proxmox Cluster

    Managing a Proxmox Virtual Environment (PVE) cluster can sometimes require removing a node, especially in a small 2-node setup. This guide will walk you through the steps to safely delete a node from your Proxmox cluster.

    Prerequisites

    Before you begin, ensure you have:

    • Administrative access to the Proxmox cluster.
    • Important: Moved all virtual machines (VMs) and containers (LXCs) from the node you want to remove, using Migrate feature in the proxmox cluster. Delete all VMs/LXCs that you don’t need to use anymore. If you don’t move or delete all VMs/LXCs in the node then after delete node, these VMs/LXCs will remain appear in the web GUI after deleting node (see Step 4 to solve this).
    • Backed up any important data.

    Steps to Remove a Node

    1. Power Off the Node: First, power off the node you want to remove by using the web GUI or SSH to the server and run poweroff command. This ensures that it won’t interfere with the cluster during the removal process. As noted earlier, it’s essential to turn off the node before removing it and ensure it doesn’t restart with its current settings within the cluster network. If you power it on without adjustments, it could disrupt the cluster and make it challenging to restore functionality.
    ssh root@<node-to-remove>poweroff
    1. Adjust Expected Votes: Since you have a 2-node cluster, you need to adjust the expected votes to maintain quorum. Run the following command on the remaining node:
    pvecm expected 1

    This command sets the expected votes to 1, allowing the cluster to function with a single node temporarily.

    1. Delete the Node: Use the pvecm delnode <node-name> command to remove the node from the cluster. Replace <node-name> with the name of the node you want to delete, for example: pvecm delnode pve2
    pvecm delnode pve2

    This command updates the cluster configuration and removes the node.

    1. Clean Up Configuration Files: If the node still appears in the Proxmox GUI, you might need to manually remove its configuration files. On the remaining node, delete the directory corresponding to the removed node:
    rm -rf /etc/pve/nodes/<node-name>

    The output should no longer list the removed node.

    1. Verify the Removal: Check the cluster status to ensure the node has been successfully removed:
    pvecm status

    The output should no longer list the removed node.

    Conclusion

    Removing a node from a 2-node Proxmox cluster requires careful steps to maintain cluster integrity. By following this guide, you can safely delete a node and ensure your cluster continues to operate smoothly. Always remember to back up your data and verify each step to avoid any disruptions.

    If, for whatever reason, you want the removed server to join the same cluster again, you have to:

    • Do a fresh install of Proxmox VE on it,
    • Then join it.

    I hope this helps! If you have any further questions or need additional assistance, feel free to share your experiences or ask questions in the comments below! 😊

  • How to Change Proxmox Management IP Address

    How to Change Proxmox Management IP Address

    Changing the management IP address of your Proxmox server is a common task that may be necessary when moving your server to a new network or reorganizing your existing network. This blog post will guide you through the steps to successfully change the Proxmox management IP address.

    Understanding Proxmox Network Configuration

    Before proceeding with the IP address change, it’s important to understand that Proxmox uses a static IP address setup by default. This IP address is used to access the web management interface on port 8006.

    Remember to perform these actions during a maintenance window or when it’s convenient, as network changes can temporarily disrupt access to the Proxmox server.

    Step-by-step guide to change the Proxmox Management IP Address

    Step 1 – Access the Proxmox Server: Log in to your Proxmox server via SSH or directly through the console.

    Step 2 – Edit Network Configuration: Use a text editor like nano to edit the /etc/network/interfaces file. This file contains the network configuration for your Proxmox server.

    nano /etc/network/interfaces

    Step 3 – Locate the Current IP Configuration: Find the section in the file that corresponds to your management network interface, usually labeled as eth0.

    auto eth0iface eth0 inet static    address 192.168.1.100    netmask 255.255.255.0    gateway 192.168.1.1

    Step 4 – Update the IP Address: Change the address line to your new desired IP address. If you are changing the subnet, you will also need to update the netmask and gateway.

    Step 5 – Save the Changes: After making the necessary changes, save the file and exit the text editor (in nano, you can do this by pressing Ctrl+X, then Y, and then Enter).

    Step 6 – Restart the network service: Apply the changes by restarting the network service. This can be done using the following command:

    systemctl restart networking

    Step 7 – Verify the changes: Confirm that the IP address has been updated by checking the network interface configuration with below command. Replace eth0 with the actual network interface name if it’s different:

    ip addr show eth0

    Step 8 – Edit the Hosts File: Update the /etc/hosts file with the new IP address to ensure that the Proxmox server can correctly resolve its own hostname

    nano /etc/hosts

    Step 9 – Reboot the Server: Once all changes are made, reboot the Proxmox server to apply the new network configuration if needed:

    reboot now

    Step 10 – Verify the Changes: After the server reboots, verify that you can access the Proxmox web interface using the new IP address.

    Step 11 – Update IP of VMs, LXC and other services: If needed, you have to change IP of proxmox virtual machines, lxc containers and other services. For example, in my case, I have to update IP address of OPNsense VM, and update it’s gateway address by go to OPNsense management web GUI -> System -> Gateway -> Configurations to change these parameters:

    Update OPNsense Gateway IP address

    Conclusion

    Changing the management IP address of your Proxmox server is a straightforward process that involves editing a couple of configuration files and rebooting the server. Always ensure that you have a backup of your configuration files before making changes, and verify that the new settings are working as expected.

    Remember, this guide focuses on changing the management IP address and does not cover changes to the IP addresses of virtual machines or containers hosted on the Proxmox server. For more detailed instructions or if you encounter any issues, consider watching tutorial videos or reading comprehensive guides available online.

    Happy virtualizing!

  • How to add NFS share from Synology DSM to backup Proxmox virtual machine

    How to add NFS share from Synology DSM to backup Proxmox virtual machine

    To set up an NFS share from a Synology DSM (DiskStation Manager) and use it to back up a Proxmox virtual machine (VM), you’ll need to follow a series of steps. Here’s a detailed, step-by-step guide to help you through the process:

    1. Set Up NFS Share on Synology DSM

    1.1. Log into Synology DSM

    • Open a web browser and log into your Synology DSM interface using your administrator credentials.

    1.2. Open Control Panel

    • Go to the Control Panel from the main menu.

    1.3. Configure NFS

    • Navigate to File Services.
    • Under the File Services tab, click on NFS and enable NFS by checking the appropriate box. Click Apply if prompted.
    Enable NFS service in Synology DSM

    1.4. Create a Shared Folder

    • Go to Shared Folder under File Services.
    • Click Create to set up a new shared folder. Follow the wizard to define the folder name, location, and permissions.
    Create shared folder to use as NFS for Proxmox
    • Configure the shared folder quota if you want to limit backup capacity
    Config shared folder quota

    1.5. Configure NFS Permissions

    • After creating the shared folder, select it from the list and click Edit.
    • Go to the Permissions tab, and then click on NFS Permissions.
    • Click Create to add a new NFS rule.
    • In the NFS rule setup, specify the following:
      • Hostname or IP: Enter the IP address of your Proxmox server or use * for all.
      • Privilege: Set to Read/Write (or Read-only if you only need read access).
      • Squash: Select the appropriate option (usually Map all users to admin). If you do not select ‘Map all users to admin’ for the Squash option, you will encounter a ‘Permission’ error when backing up LXC containers on Proxmox.
      • Security: Configure as needed (default is often sufficient).
    • Click OK to apply the settings.
    Config NFS Permissions

    2. Mount the NFS Share on Proxmox

    2.1. Log into Proxmox Web Interface

    • Open your web browser and log into the Proxmox VE web interface.

    2.2. Access Node Configuration

    • Select the Proxmox node where you want to mount the NFS share.
    • Go to the Datacenter view and then to the Storage tab.

    2.3. Add NFS Storage

    • Click Add and select NFS.
    • Fill in the NFS configuration details:
      • ID: Enter a unique name for the storage.
      • Server: Enter the IP address or hostname of your Synology NAS.
      • Export: Enter the path of the shared folder created on Synology (e.g., /volume2/proxmox).
      • Content: Check the boxes for the types of content you want to store (e.g., VZDump backup file).
      • Nodes: Select the nodes that should have access to this storage.
    • Click Add to save the configuration.
    NFS configuration details

    3. Configure Backup Job

    3.1. Go to Proxmox Backup Configuration

    • In the Proxmox web interface, navigate to Datacenter and then to Backup.

    3.2. Create a Backup Job

    • Click Add to create a new backup job.
    • Configure the job settings:
      • ID: Enter a name for the backup job.
      • Storage: Select the NFS storage you configured earlier.
      • Schedule: Set the schedule for automatic backups.
      • Compression: Choose the compression method if required.
      • Retention: Configure how long backups should be retained.

    3.3. Specify VM and Backup Options

    • Choose the VMs to be backed up.
    • Configure additional options as needed, such as backup mode (snapshot, stop, or suspend).

    4. Verify and Monitor

    4.1. Run Backup Job Manually

    • To test the configuration, you can run the backup job manually from the backup configuration screen.

    4.2. Monitor Backup Jobs

    • Check the status of backup jobs and ensure that they are running successfully.
    • Monitor logs and storage space to ensure everything is working as expected.

    Troubleshooting

    • Connection Issues: Ensure that the Proxmox server can reach the Synology NAS over the network and that there are no firewall rules blocking NFS traffic.
    • Permissions Issues: Double-check NFS permissions on the Synology DSM and ensure that the Proxmox server IP has the correct access rights.

    By following these steps, you should be able to successfully set up an NFS share on Synology DSM and use it for backing up Proxmox virtual machines.