Are you tired of dealing with dynamic IP addresses and want a reliable way to access your home server or services remotely? Cloudflare DDNS (Dynamic DNS) is a great solution!
In this guide, we’ll walk you through setting up Cloudflare DDNS using Docker.
Step-by-Step Guide
Step 1: Create a Domain on Cloudflare:
-
- Sign up for a Cloudflare account if you don’t already have one.
- Add your domain to Cloudflare and choose the free plan.
- Change your domain’s name servers to Cloudflare’s name servers.
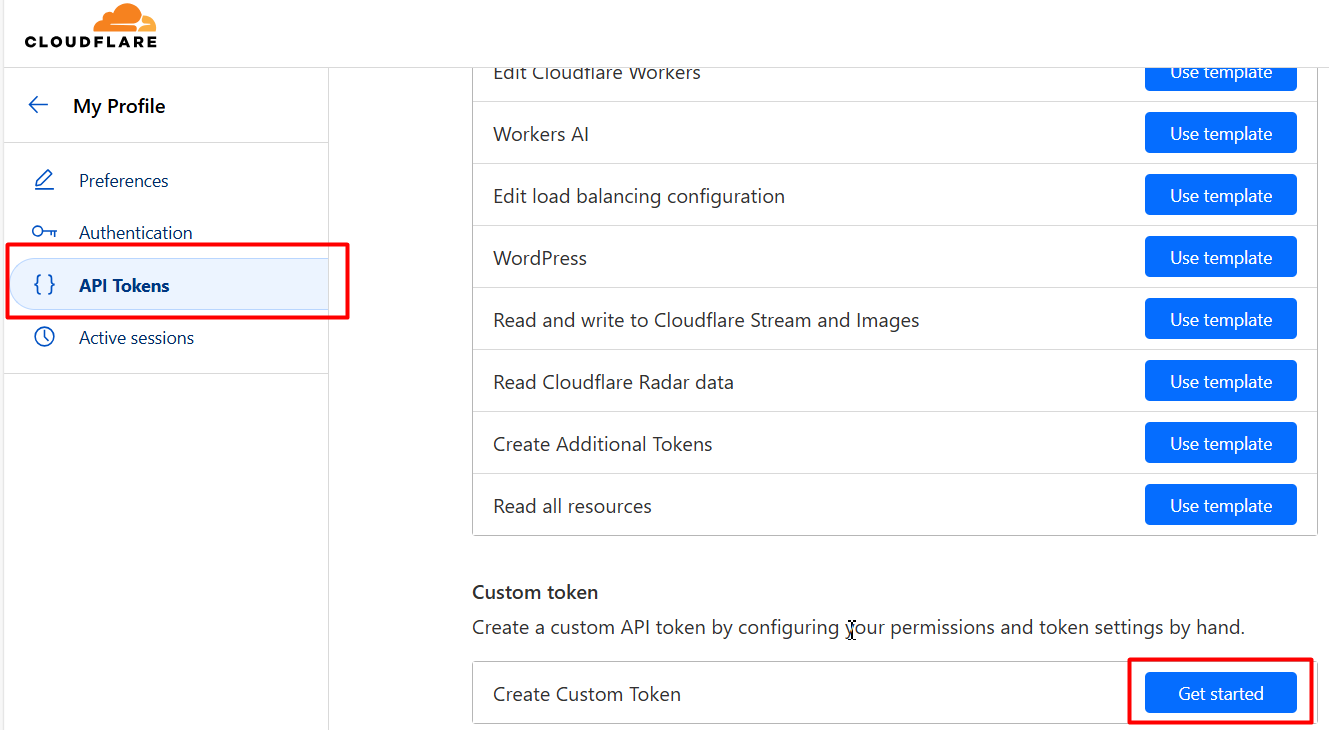
Step 2: Log in to your Cloudflare account, navigate to API Token page: https://dash.cloudflare.com/profile/api-tokens
Step 3: Scroll down to the bottom of the page and click on “Get started” button in the Custom token section.
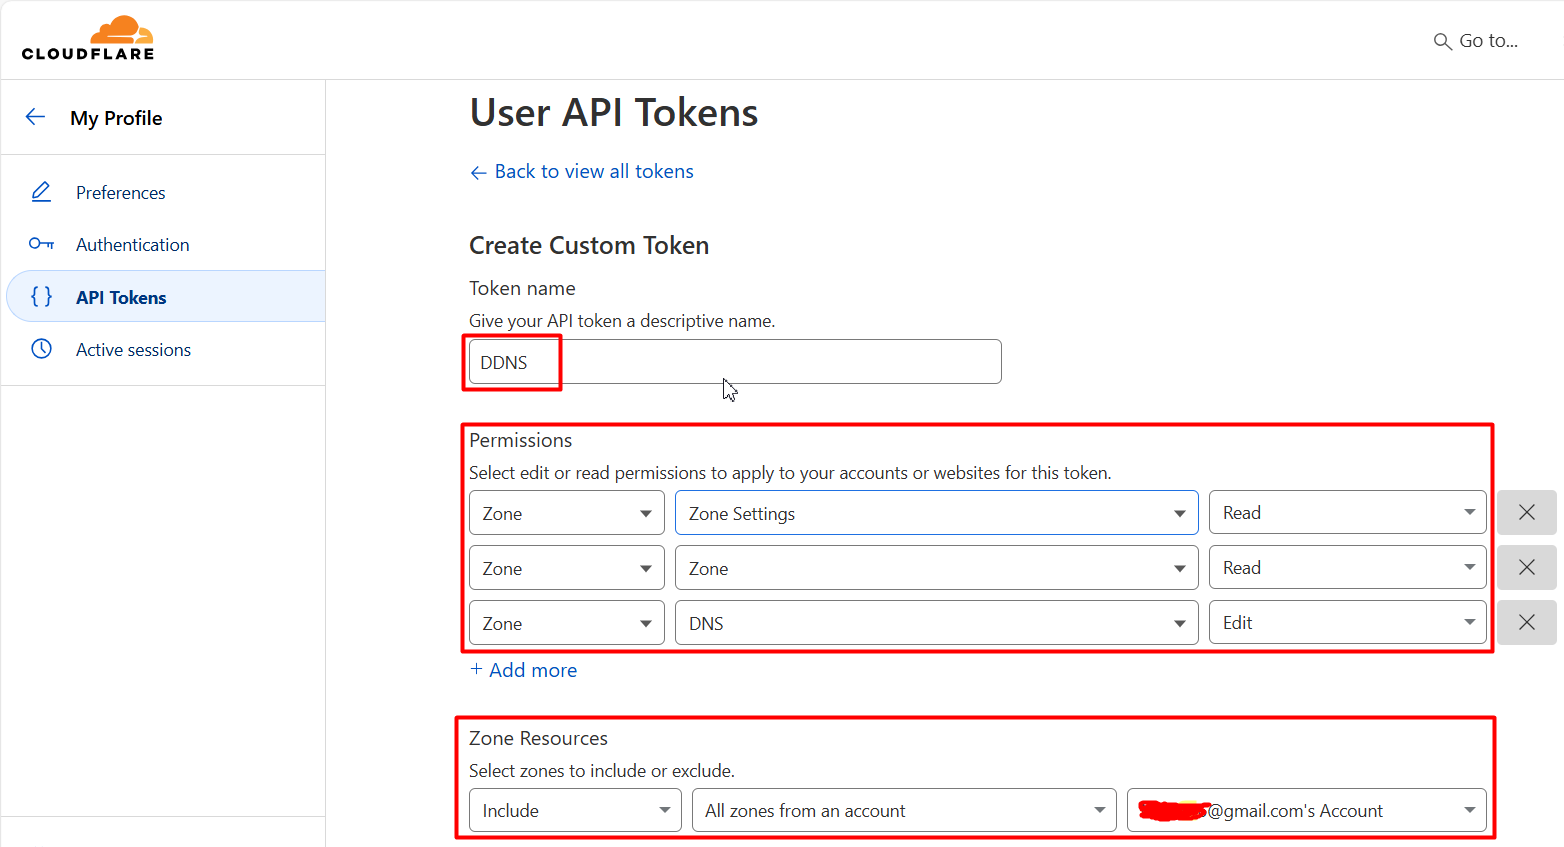
Step 4: Config the parameters as below, then click Continue to summary
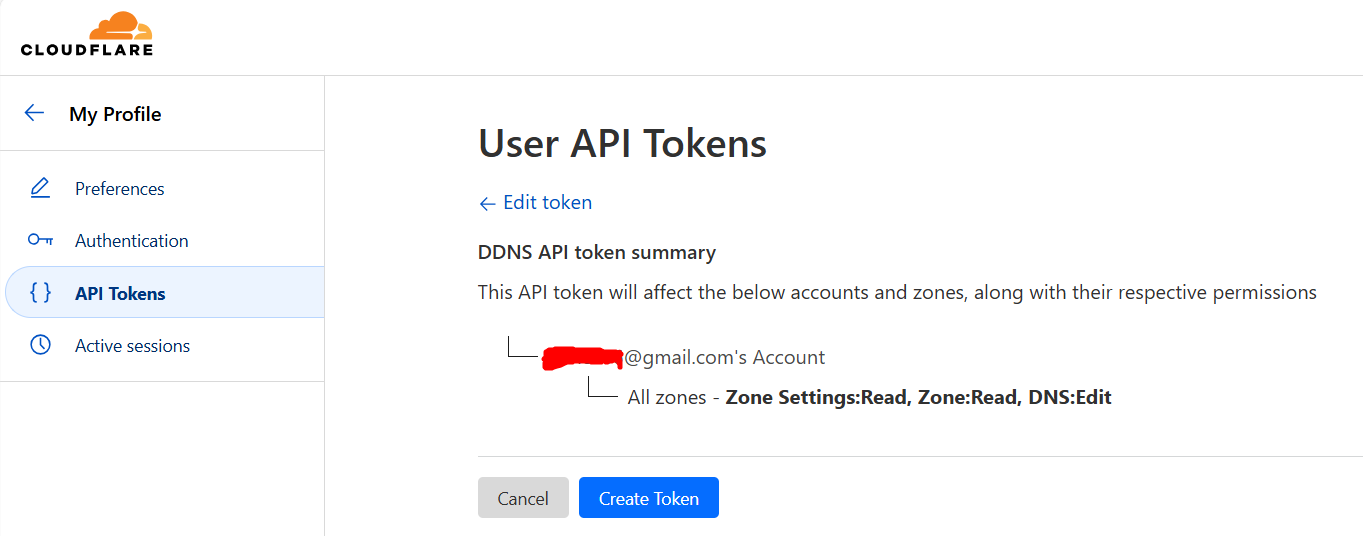
Step 5: Click on Create Token on the next screen, the Copy and Save the Token:
Step 6: Deploy the Cloudflare DDNS Docker Container using Portainer Stack or Docker Compose.
- Set PROXIED=false if you use DDNS for DNS only.
- Set PROXIED=true if you use DDNS for other services such as web…
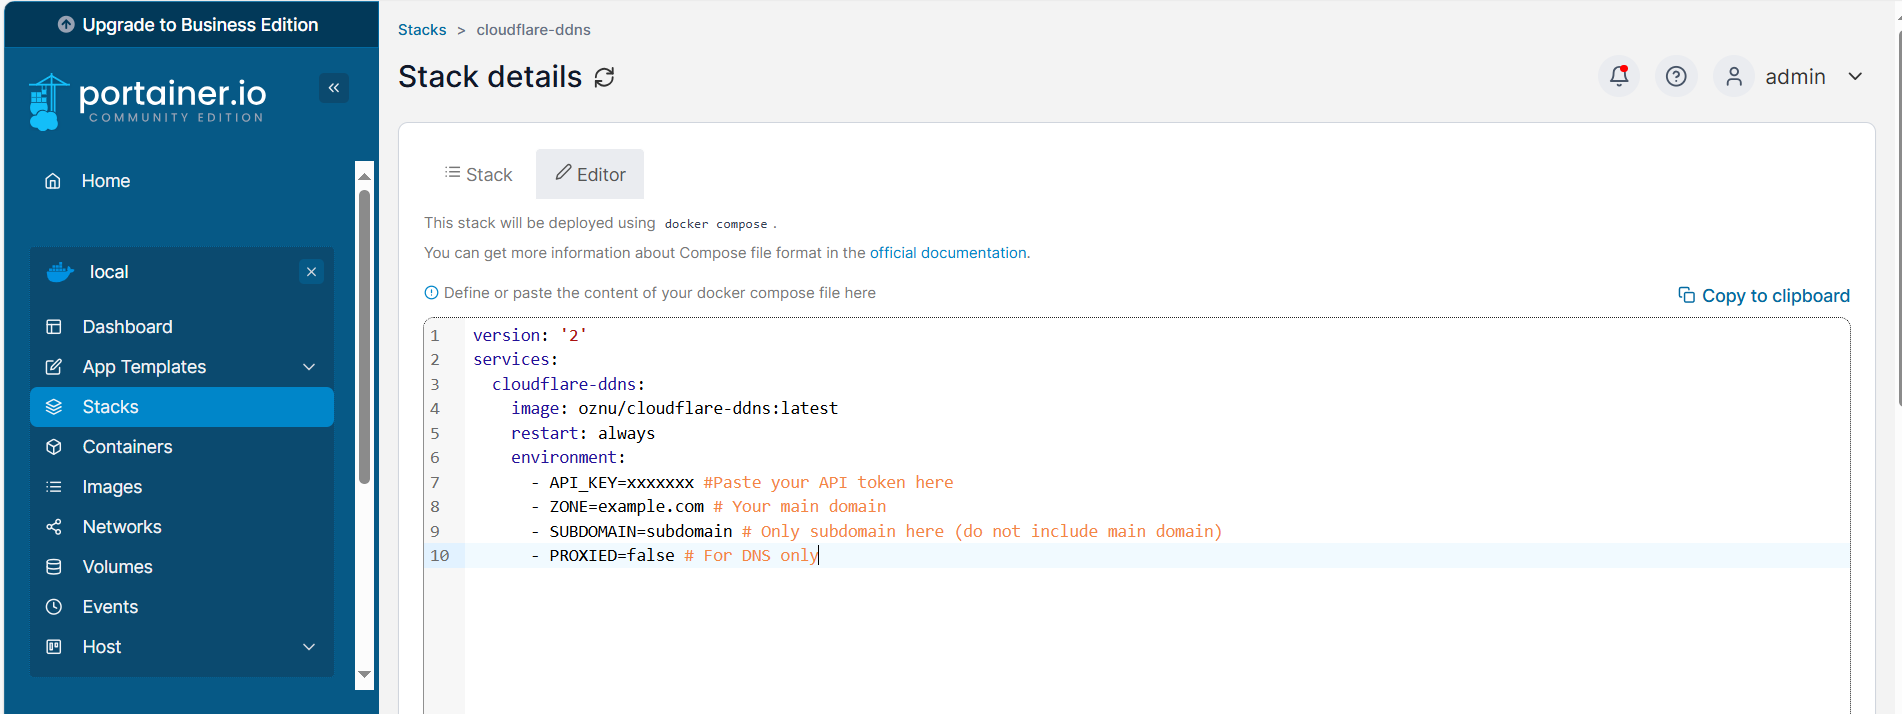
version: '2'services: cloudflare-ddns: image: oznu/cloudflare-ddns:latest restart: always environment: - API_KEY=xxxxxxx #Paste your API token here - ZONE=example.com # Your main domain - SUBDOMAIN=subdomain # Only subdomain here if any (do not include main domain) - PROXIED=false # False For DNS only; true for webStep 7: Verify the Setup:
-
- Check the logs of the Docker container to ensure it’s running and updating the DNS records every few minutes.
- You can view the logs with the command:
docker logs <container_id>.
Step 8: Access Your Services:
Use your domain name (e.g., your_subdomain.your_domain.com) instead of your dynamic IP address to access your home server or services.
Conclusion
Setting up Cloudflare DDNS with Docker is a straightforward process that can save you a lot of headaces with dynamic IP addresses. With this setup, you’ll have a reliable way to access your home server or services from anywhere in the world.
Feel free to ask if you have any questions or need further assistance!