Tag: Docker

  • Unlock AI Power: Run DeepSeek Locally on OpenMediaVault with Docker Compose

    Unlock AI Power: Run DeepSeek Locally on OpenMediaVault with Docker Compose

    Introduction
    OpenMediaVault (OMV) is a versatile, open-source NAS platform perfect for self-hosted workflows. By combining it with Docker, you can deploy powerful tools like DeepSeek—a state-of-the-art AI model optimized for coding, mathematics, and logical tasks—directly on your hardware. This guide walks you through running DeepSeek on OMV using Docker Compose, Ollama (for local AI management), and Open WebUI (a user-friendly interface), bypassing cloud dependencies and keeping your data private.


    Why Host DeepSeek on Your OMV Server?

    1. Full Data Control:
      Avoid sending sensitive code, financial data, or proprietary information to third-party servers.
    2. Offline Accessibility:
      Use DeepSeek even without an internet connection—ideal for labs or remote workspaces.
    3. Hardware Flexibility:
      Scale resources based on your needs. Run smaller models on modest hardware or leverage GPU acceleration for complex tasks.

    Step-by-Step Installation Guide

    Prerequisites

    • OpenMediaVault (v6.x+) with OMV-Extras and Docker installed.
    • A shared folder for Docker data (e.g., docker).
    • At least 8GB of RAM (16GB+ recommended for larger models).

    Step 1: Prepare Docker Directories

    1. In the OMV web interface, go to Storage > Shared Folders.
    2. Create subfolders for Ollama and Open WebUI under your existing Docker shared folder:
      • ollama (to store AI models)
      • open-webui (to store UI settings and chat history)

    Step 2: Create the Docker Compose File

    1. Navigate to Services > Compose > Files in the OMV interface.
    2. Click Create, name the file deepseek.yml, and paste the following configuration:
    version: "3.8"services:  ollama:    image: ollama/ollama    ports:      - "11434:11434"    volumes:      - /sharedfolders/docker/ollama:/root/.ollama  # Use your shared folder path    restart: unless-stopped  open-webui:    image: ghcr.io/open-webui/open-webui:main    ports:      - "8080:8080"    environment:      - OLLAMA_BASE_URL=http://ollama:11434    volumes:      - /sharedfolders/docker/open-webui:/app/backend/data    depends_on:      - ollama    restart: unless-stopped

    Notes:

    • Replace /sharedfolders/docker with your actual Docker shared folder path (visible under Storage > Shared Folders).
    • The ollama service hosts the AI models, while open-webui provides the chat interface.

    Step 3: Deploy the Stack

    1. In the OMV Compose plugin interface, select the deepseek.yml file.
    2. Click Up to start the containers.
    3. Verify the status under Services > Compose > Containers—both ollama and open-webui should show as “Running.”

    Step 4: Access Open WebUI

    1. Open http://<your-omv-ip>:8080 in a browser.
    2. Create an admin account (disable public sign-ups later via Settings > Authentication).

    Step 5: Download the DeepSeek Model

    1. Option 2: Via Open WebUI:
      • Go to the Models tab.
      • Search for deepseek-coder:33b and click Download.

    Option 1: Via OMV’s CLI (SSH or Services > SSH > Terminal):

    docker exec -it ollama ollama pull deepseek-coder:33b

    Step 6: Start Using DeepSeek

    Select the deepseek-coder:33b model from the dropdown and ask questions like:

    • “Write a script to back up my OMV shared folders to an external drive.”
    • “Optimize this Python code for memory efficiency.”

    Conclusion & Pro Tips

    You’ve now transformed your OpenMediaVault server into a private AI workstation. To optimize your setup:

    1. Integrate with OMV Workflows:
      Use Ollama’s API (port 11434) to connect DeepSeek to automation scripts or cron jobs.
    2. Monitor Resource Usage:
      Check OMV’s System > Performance Statistics to ensure RAM/CPU stays within limits.
    3. Update Containers:
      Periodically refresh your Docker images via the Compose plugin:
      • Click Pull for the deepseek.yml stack, then Down and Up to restart.
    4. Experiment with Models:
      Try smaller models like deepseek-coder:6.7b for faster responses or quantized versions for lower RAM usage.

    Final Checklist:

    • [ ] Verify shared folder permissions match Docker’s requirements.
    • [ ] Set up OMV’s firewall (Network > Firewall) to restrict external access to port 8080 if needed.
    • [ ] Explore Open WebUI’s prompt templates for coding or math-specific tasks.

    With DeepSeek running locally on OMV, you’re equipped to tackle complex challenges while maintaining full ownership of your data. Happy coding!

  • How to Use Cloudflare DDNS with Docker

    How to Use Cloudflare DDNS with Docker

    Are you tired of dealing with dynamic IP addresses and want a reliable way to access your home server or services remotely? Cloudflare DDNS (Dynamic DNS) is a great solution!

    In this guide, we’ll walk you through setting up Cloudflare DDNS using Docker.

    Step-by-Step Guide

    Step 1: Create a Domain on Cloudflare:

      • Sign up for a Cloudflare account if you don’t already have one.
      • Add your domain to Cloudflare and choose the free plan.
      • Change your domain’s name servers to Cloudflare’s name servers.

    Step 2: Log in to your Cloudflare account, navigate to API Token page: https://dash.cloudflare.com/profile/api-tokens

    Step 3: Scroll down to the bottom of the page and click on “Get started” button in the Custom token section.

    Step 4: Config the parameters as below, then click Continue to summary

    Step 5: Click on Create Token on the next screen, the Copy and Save the Token:

    Step 6: Deploy the Cloudflare DDNS Docker Container using Portainer Stack or Docker Compose.

    • Set PROXIED=false if you use DDNS for DNS only.
    • Set PROXIED=true if you use DDNS for other services such as web…
    version: '2'services:  cloudflare-ddns:    image: oznu/cloudflare-ddns:latest    restart: always    environment:      - API_KEY=xxxxxxx #Paste your API token here      - ZONE=example.com # Your main domain      - SUBDOMAIN=subdomain # Only subdomain here if any (do not include main domain)      - PROXIED=false # False For DNS only; true for web

    Step 7: Verify the Setup:

      • Check the logs of the Docker container to ensure it’s running and updating the DNS records every few minutes.
      • You can view the logs with the command: docker logs <container_id>.

    Step 8: Access Your Services:

    Use your domain name (e.g., your_subdomain.your_domain.com) instead of your dynamic IP address to access your home server or services.

    Conclusion

    Setting up Cloudflare DDNS with Docker is a straightforward process that can save you a lot of headaces with dynamic IP addresses. With this setup, you’ll have a reliable way to access your home server or services from anywhere in the world.

    Feel free to ask if you have any questions or need further assistance!

  • How to install Komga in OpenMediaVault Using Docker Compose

    How to install Komga in OpenMediaVault Using Docker Compose

    Komga is a free and open-source media server for your comics, manga, magazines, and books. It supports comic book archives such as CBZ and CBR (except solid archives, for RAR5 see below); eBooks in EPUB format; and PDF files.

    This article provides a concise guide on how to install Komga in OpenMediaVault (OMV) using Docker Compose.

    Prerequisites

    • OpenMediaVault installed and running
    • Docker and Docker Compose installed on OMV
    • Basic knowledge of using the OMV web interface

    Step-by-Step Guide

    1. Create Necessary Folders

    1. Go to Storage > Shared Folders.
    2. Create another folder named komga for Komga’s configuration and data.

    2. Create Docker Compose File

    Navigate to Services > Compose > Files and add the following content to the file:

    version: '3.3'services:  komga:    image: gotson/komga    container_name: komga    volumes:      - /path/to/komga/config:/config      - /path/to/komga/data:/data    ports:      - 25600:25600    restart: unless-stopped

    Remeber to replace /path/to/komga/config and /path/to/komga/data with the actual paths to your komga folder.

    In my case, because I have already add global environment file for OpenMediaVault docker, so my compose file is simple as the picture below:

    My compose file for Komga in OpenMediaVault

    After carefully finish editing all the parameters, Save the compose file and click Up button to deploy Komga container.

    Deloy the Komga container in OpenMediaVault

    3. Initial login and setup

    Open your web browser and starting to use Komga. At this time, Komga should now be running and accessible at http://<your-OMV-IP>:25600.

    At the first step, Komga will ask you to create a user account. Choose an email and password, then click on Create User Account and start using Komga.

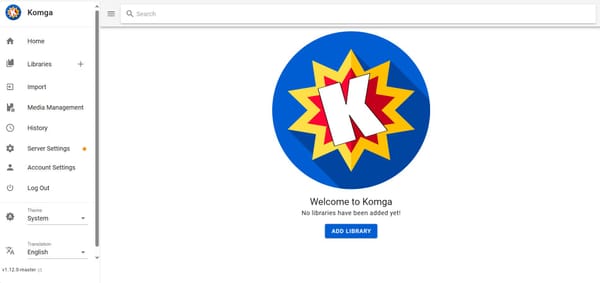
    Komga overview

    Conclusion

    You have successfully installed Komga on OpenMediaVault using Docker Compose. You can now start adding your comics, manga, and books to Komga and enjoy your media library.

  • Installing qBittorrent on openmediavault Using Docker Compose

    qBittorrent is a popular, open-source BitTorrent client that offers a clean interface and a wide range of features. It is designed to be a lightweight alternative to other BitTorrent clients while providing the same level of functionality. With qBittorrent, users can manage their torrent downloads efficiently, thanks to features like an integrated search engine, RSS feed support, and remote control via a web user interface. In this blog post, we will go through step-by-step to install qBittorrent on OpenMediaVault using Docker Compose, as well as some initial setting for it.

    Step-by-Step Guide to Install qBittorrent on openmediavault Using Docker Compose

    Prerequisites:

    Step 1: Prepare Your Environment

    1. Log in to openmediavault: Access your openmediavault web interface.
    2. Enable Docker Repo: Navigate to System > omv-extras and enable the Docker repository. Click Save and then Apply.
    3. Install Docker and Docker Compose: Go to System > Plugins, search for docker and openmediavault-compose, and install both plugins.

    Step 2: Create a Docker Compose File

    Go to Services -> Compose -> Files, then click New to create new docker-compose.yaml file for qBittorrent.

    For me, I use the docker-compose content from linuxserver: https://hub.docker.com/r/linuxserver/qbittorrent

    ---services:  qbittorrent:    image: lscr.io/linuxserver/qbittorrent:latest    container_name: qbittorrent    environment:      - PUID=1000      - PGID=1000      - TZ=Etc/UTC      - WEBUI_PORT=8080      - TORRENTING_PORT=6881    volumes:      - /path/to/qbittorrent/appdata:/config      - /path/to/downloads:/downloads #optional    ports:      - 8080:8080      - 6881:6881      - 6881:6881/udp    restart: unless-stopped

    Paste the above content to Remember to change the parameters according to your system. Then click Save.

    Step 3: Deploy the qBittorrent Container

    Click “Up” button to pull the docker image and deploy the container. Wait for it’s status change to “Up”.

    Step 4: Access the qBittorrent Web Interface

    1. Open Your Browser: Navigate to http://<your-server-ip>:8080 to access the qBittorrent web interface.
    2. Login: The default username is admin and the default password is automatically generated. You can get the password by SSH into OpenMediaVault and run the following command to read to qBittorrent container log and get the password there.
    docker logs qbittorrent

    Make sure to change these credentials after your first login for security reasons.

    Change Default Credentials: Go to Options > Web UI and change the default username and password.

    Set Download Locations: Configure your download locations under Downloads to ensure your files are saved in the correct directories. For me I also config other settings as below:

    Config OpenTracker: udp://tracker.opentrackr.org:1337/announce

    Configure Bandwidth Limits: Set appropriate upload and download speed limits under Speed to manage your network usage.

    Enable IP Filtering: For added security, enable IP filtering under Connection.

    By following these steps, you should have a fully functional qBittorrent setup on your openmediavault server using Docker Compose. Enjoy your efficient and powerful torrent management system!

  • How to Install Docker, Docker Compose, and Portainer on OpenMediaVault Using OMV-Extras

    How to Install Docker, Docker Compose, and Portainer on OpenMediaVault Using OMV-Extras

    OpenMediaVault (OMV) is a powerful and flexible NAS (Network Attached Storage) solution based on Debian Linux. By leveraging OMV-Extras, you can easily install Docker, Docker Compose, and Portainer to manage your containers efficiently. This guide will walk you through the steps to get everything set up.

    Prerequisites

    • A running instance of OpenMediaVault (preferably version 6 or later).
    • Basic knowledge of SSH and command-line operations.
    • Internet access to download necessary packages.

    Step 1: Install OMV-Extras

    OMV-Extras is a plugin that extends the functionality of OpenMediaVault by adding additional repositories and plugins.

    SSH into your OMV server: Open a terminal and connect to your OMV server using SSH.

    ssh your-username@your-omv-ip

    Install OMV-Extras: Run the following commands to download and install OMV-Extras.

    wget -O - https://github.com/OpenMediaVault-Plugin-Developers/packages/raw/master/install | bash

    Step 3: Enable Docker Repository

    1. Access OMV Web Interface: Open your web browser and navigate to the OMV web interface (usually http://your-omv-ip).
    2. Enable Docker Repo: Go to System > OMV-Extras and enable the Docker repository. Click Save and then Apply.

    Step 3: Install Docker Compose

    Docker Compose is now part of the openmediavault-compose plugin. Search for openmediavault-compose in the plugins section, select it and click on Install button, check the Confirm box and click Yes to install it.

    Wait for the OpenMediaVault Compose plugin installation complete, then press Close.

    Now the Compose section should appear under Plugin menu:

    Step 4: Create user for docker

    Go to Users -> Users > Create User to create a new user call appuser. For the Shell scetion, we don’t need this account using terminal so choose usr/sbin/nologin. For Groups, choose users. Then click Save, and Apply.

    Step 5: Configure Docker

    1. Create a Shared Folder for Docker: Go to Storage > Shared Folders and create a new shared folder named dockerdata on your desired volume.
    2. Create a shared folder for compose file: dockerdata/appdata as shown in the pictures above.
    3. Similarly, create a shared folder for compose file: dockerdata/backup_compose.
    4. Create a shared folder for docker file: dockerdata/docker
    5. Create a shared folder for data file in the main HDD (to define a path to a shared folder using the CHANGE_TO_COMPOSE_DATA_PATH variable): data
    6. Set Docker Storage Path: Go to Services > Docker > Settings. Set the Docker storage path to the shared folders you have created. Click Save and then Apply.

    Step 5: Install Portainer

    Portainer is a lightweight management UI that allows you to easily manage your Docker environments.

    1. Install Portainer: Go to Services > Compose > Files. Click on Add from example and select portainer. Name it portainer and click Save.
    2. Deploy Portainer: In the same Compose section, click on the Up arrow to deploy Portainer. This will download and start the Portainer container.
    3. Access Portainer: Open your web browser and navigate to http://your-omv-ip:9000. Follow the setup instructions to configure Portainer.

    Conclusion

    By following these steps, you should have Docker, Docker Compose, and Portainer up and running on your OpenMediaVault server. This setup allows you to manage your containers efficiently and take full advantage of the powerful features OMV offers.

  • Docker Networking Tutorial: Bridge, None, Host, IPvlan, Macvlan, Overlay

    Docker Networking Tutorial: Bridge, None, Host, IPvlan, Macvlan, Overlay

    Docker networking is a crucial aspect of containerization, enabling communication between containers and external applications. This tutorial covers the different Docker network drivers and their specific use cases, along with commands to create each type of network.
    Bridge Network

    docker bridge network

    The default network mode, the bridge network, connects containers on the same host. It creates a virtual network allowing containers to communicate with each other using IP addresses. However, it has limitations, especially in production environments. Creating a user-defined bridge network allows for DNS-based communication between containers, enhancing flexibility and ease of use. These are the advantages of user-defined bridge network in docker:

    1. Automatic DNS Resolution: Containers on a user-defined bridge network can resolve each other by name or alias, making it easier to manage and connect services.
    2. Better Isolation: User-defined bridges provide better isolation as only containers attached to the same user-defined network can communicate with each other.
    3. Attach/Detach Flexibility: Containers can be attached or detached from user-defined networks on the fly without needing to stop and recreate them.
    4. Configurable Settings: Each user-defined network creates a configurable bridge, allowing customization of settings like MTU and iptables rules.

    Command to create a Bridge network:

    docker network create --driver bridge my_bridge_network

    None Network

    The none network mode completely isolates the container from the host and other containers. Only the loopback interface is created, making it ideal for running batch jobs or data processing pipelines where network isolation is required.

    Command to create a None network:

    docker network create --driver none my_none_network

    Host Network

    In host network mode, the container shares the host’s networking namespace, appearing as a regular application on the host. This mode is used to optimize performance and is suitable for applications requiring high port usage. However, it lacks network isolation, which can be a drawback in certain scenarios.

    Command to create a Host network:

    docker network create --driver host my_host_network

    IPvlan Network

    IPvlan is a lightweight network virtualization technique that assigns IP addresses from the same CIDR range as the host. It eliminates the need for port mappings, making it easier to provide access for external-facing services. This mode is beneficial for applications requiring direct network access without additional complexity.

    Command to create an IPvlan network:

    docker network create -d ipvlan \  --subnet=192.168.1.0/24 \  --gateway=192.168.1.1 \  -o parent=eth0 my_ipvlan_network

    Macvlan Network

    Macvlan assigns a unique MAC address to each container’s virtual network interface, making it appear as a physical network interface. This mode is suitable for legacy applications or those monitoring network traffic, providing direct connectivity to the physical network.

    Command to create a Macvlan network:

    docker network create -d macvlan \  --subnet=192.168.1.0/24 \  --gateway=192.168.1.1 \  -o parent=eth0 my_macvlan_network

    Overlay Network

    The overlay network driver creates a distributed network among multiple Docker daemon hosts, allowing secure communication between containers on different hosts. It is commonly used with Docker Swarm but can also connect individual containers. This mode is ideal for managing containers at scale, especially in production environments.

    Command to create an Overlay network:

    docker network create -d overlay my_overlay_network

    Conclusion

    Understanding Docker networking modes is essential for optimizing container communication and performance. Each network driver has its unique advantages and use cases, making it crucial to choose the right one based on your application’s requirements.

  • How to Install AdGuard Home on OpenMediaVault Using openmediavault-compose

    How to Install AdGuard Home on OpenMediaVault Using openmediavault-compose

    AdGuard Home is a comprehensive network-wide software that blocks ads and tracking services, enhancing privacy and security for all devices connected to a network. It operates as a DNS server, filtering out unwanted content before it reaches your devices, similar to a local version of a public DNS service like AdGuard DNS.

    Here’s a brief overview:

    1. Ad-Blocking: AdGuard Home blocks ads across all devices on your network, including smartphones, tablets, and smart TVs. This is especially useful for devices where traditional ad blockers may not work as effectively.
    2. Privacy Protection: By blocking tracking scripts and analytics systems, AdGuard Home prevents third parties from collecting your data, offering a higher level of privacy.
    3. DNS-Based Filtering: As a DNS server, AdGuard Home filters requests at the network level. This means that ads and trackers are blocked before they even reach your devices, reducing the amount of data downloaded and speeding up your internet connection.
    4. Customizability: Users can create custom filters, blocklists, and allowlists to tailor the blocking to their needs. It also supports parental control features, allowing users to block access to adult content.
    5. Open Source: AdGuard Home is open-source, allowing users to inspect the code, contribute to its development, and ensure that it operates transparently.
    6. Cross-Platform: It can be installed on various devices, including Raspberry Pi, Linux, Windows, macOS, and even in Docker containers, making it highly versatile.

    In summary, AdGuard Home provides a robust, customizable, and privacy-focused solution for blocking ads and tracking across your entire home network.

    In this guide, we’ll walk you through the steps to install AdGuard Home on OpenMediaVault (OMV) using openmediavault-compose. This setup will help you manage your network’s DNS and block ads efficiently.

    Prerequisites

    • OpenMediaVault installed and running
    • openmediavault-compose plugin installed
    • Basic understanding of Docker and networking

    Step 1: Create a MacVLAN Network

    First, we need to create a MacVLAN network for the AdGuard container. This allows the container to have its own IP address, making it easier to manage ports.

    1. Access OMV Compose Plugin: Go to the OMV web interface and navigate to the openmediavault-compose plugin.
    2. Create Network: Under the “Services -> Compose -> Networks” tab, create a new network. Name it local-network.
    3. Configure Network:
      • Driver: select macvlan.
      • Parent Network: Select your main network interface, in my case it is enp2s0.
      • Subnet: Enter your subnet (e.g., 192.168.1.0/24).
      • Gateway: Enter your gateway (e.g., 192.168.1.1).
      • IP range: Enter your expected IP for Adguard Home (e.g., 192.168.1.200/32).
      • Click Save.

    Step 2: Create Docker Compose File

    Now, we’ll create a Docker Compose file to configure and run the AdGuard Home container.

    1. Create Compose File: Go to Services -> Compose -> Files, create a new compose file and name it adguard.
    2. Add Configuration: Paste the following configuration into the compose file. Remember to change the ipv4_address to match your network configuration. Then click Save.
    ---services:    adguardhome:        container_name: adguardhome        image: adguard/adguardhome        networks:          adguardhome:            ipv4_address: 192.168.1.200  #Change this to your ip address        volumes:            - CHANGE_TO_COMPOSE_DATA_PATH/adguardhome/workdir:/opt/adguardhome/work            - CHANGE_TO_COMPOSE_DATA_PATH/adguardhome/confdir:/opt/adguardhome/conf        restart: unless-stopped        ports:            - 53:53/tcp            - 53:53/udp            - 67:67/udp            - 68:68/udp            - 80:80/tcp            - 443:443/tcp            - 443:443/udp            - 3000:3000/tcp            - 853:853/tcp            - 784:784/udp            - 853:853/udp            - 8853:8853/udp            - 5443:5443/tcp            - 5443:5443/udpnetworks:   adguardhome:      name: local-network  #This is the name of our macvlan      external: true

    Step 3: Deploy AdGuard Home

    Deploy the AdGuard Home container using the compose file.

    1. Deploy Container: In the openmediavault-compose plugin, select the adguard compose file and click “Up”.
    2. Verify Deployment: Ensure the container is running and accessible.

    Step 4: Configure AdGuard Home

    Finally, configure AdGuard Home through its web interface.

    1. Access Web Interface: Open a web browser and go to http://192.168.1.200:3000.
    2. Initial Setup: Follow the on-screen instructions to complete the initial setup.
    3. Set DNS Server: Point your router’s DNS settings to the AdGuard Home IP address (e.g., 192.168.1.200).

    Conclusion

    Congratulations! You’ve successfully installed and configured AdGuard Home on OpenMediaVault using openmediavault-compose. This setup will help you manage your network’s DNS and block ads effectively.

    Feel free to customize this blog post to better fit your style and audience! If you have any questions or need further assistance, let me know.

  • How to Install Docker and Docker Compose on Ubuntu Server using get-docker.sh Script

    How to Install Docker and Docker Compose on Ubuntu Server using get-docker.sh Script

    Docker and Docker Compose are powerful tools for developers and system administrators alike. They enable you to run applications in isolated containers, promoting consistency, portability, and efficient resource management. Today, we’ll explore how to effortlessly install both on your Ubuntu server using the official get-docker.sh script.

    Benefits of Using get-docker.sh:

    • Simple and Efficient: This script automates the installation process, saving you time and effort compared to manual configuration.
    • Official Source: Downloading from the official Docker repository ensures you’re getting the latest stable version and reliable updates.
    • Streamlined Workflow: Once installed, you’ll be ready to leverage containerized applications and development environments with ease.

    Prerequisites:

    • An Ubuntu server with internet access.
    • Administrative (sudo) privileges.
    • Basic familiarity with the terminal and sudo commands.

    Step 1: Update Your System

    First, SSH into your server and update your package index to ensure you have the latest information about available packages.

    sudo apt update && sudo apt dist-upgrade

    Step 2: Download and Run the get-docker.sh Script

    The get-docker.sh script is an official Docker installation script that simplifies the installation process.

    Download the script:

    curl -fsSL https://get.docker.com -o get-docker.sh

    Run the script:

    sh get-docker.sh

    This script will install Docker Engine, Docker CLI, Docker Compose and containerd.

    Docker and Docker Compose installation process

    When the installation finish, you will see Docker version on the terminal screen as follow:

    Docker and Docker Compose installation finished

    Step 3: Verify Docker Installation

    After the installation is complete, verify that Docker is installed correctly by running the following commands:

    docker --versiondocker compose version

    You should see the version number of Docker and Docker Compose, confirming that it is installed correctly.

    Conclusion:

    By following these steps, you’ve successfully installed Docker and Docker Compose on your Ubuntu server using the get-docker.sh script. Now, you’re ready to leverage the power of containerized applications and development environments to streamline your workflow and enhance your development experience.

    Additional Notes:

    • Remember to restart your terminal session after installation for the changes to take effect.
    • Consult the official Docker and Docker Compose documentation for further details and advanced usage.

    I hope this blog post has been helpful! Feel free to leave any comments or questions below.