How to add NFS share from Synology DSM to backup Proxmox virtual machine
This post guides step-by-step to set up an NFS share from a Synology DSM (DiskStation Manager), add it to Proxmox and use added NFS Storage to back up Proxmox virtual machines.


To set up an NFS share from a Synology DSM (DiskStation Manager) and use it to back up a Proxmox virtual machine (VM), you'll need to follow a series of steps. Here's a detailed, step-by-step guide to help you through the process:
1. Set Up NFS Share on Synology DSM
1.1. Log into Synology DSM
- Open a web browser and log into your Synology DSM interface using your administrator credentials.
1.2. Open Control Panel
- Go to the Control Panel from the main menu.
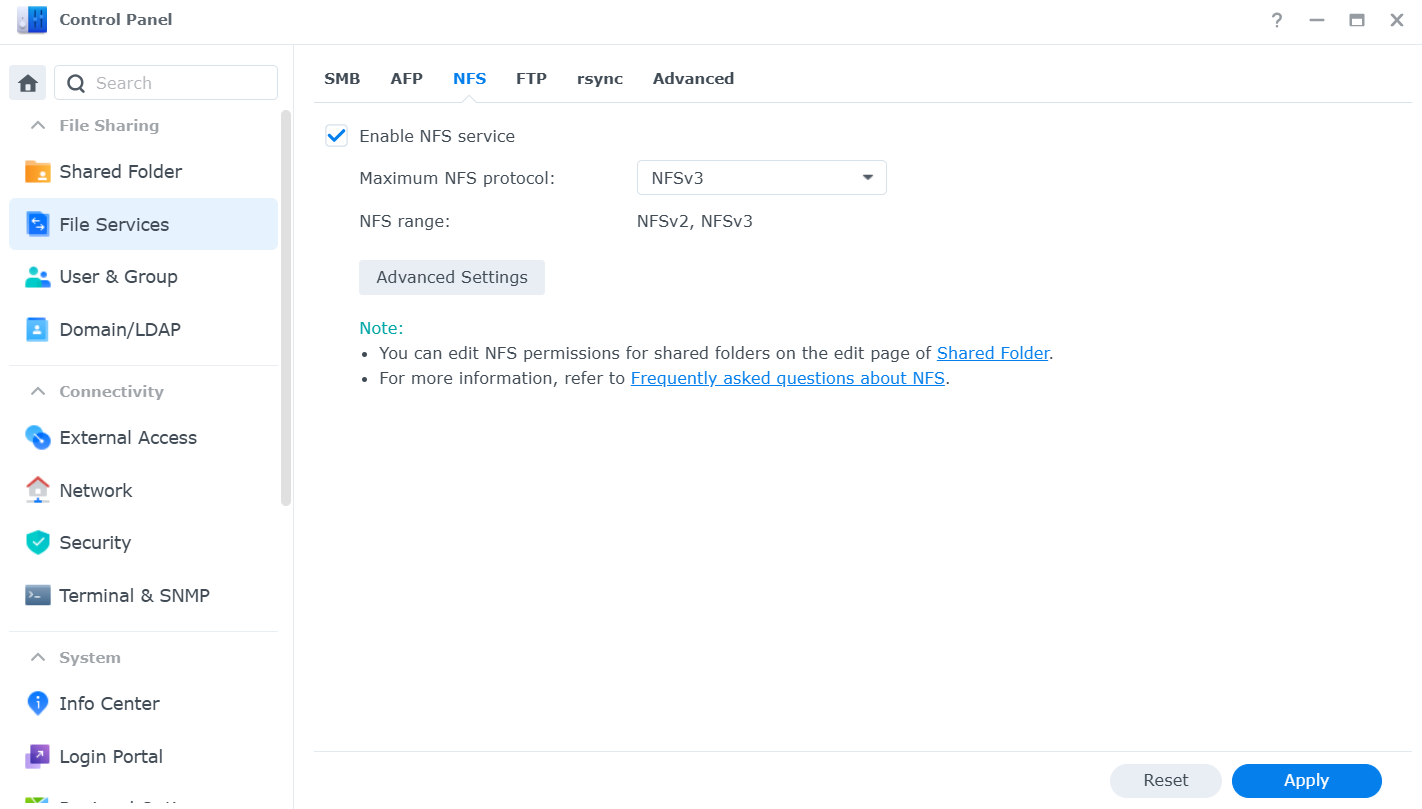
1.3. Configure NFS
- Navigate to File Services.
- Under the File Services tab, click on NFS and enable NFS by checking the appropriate box. Click Apply if prompted.
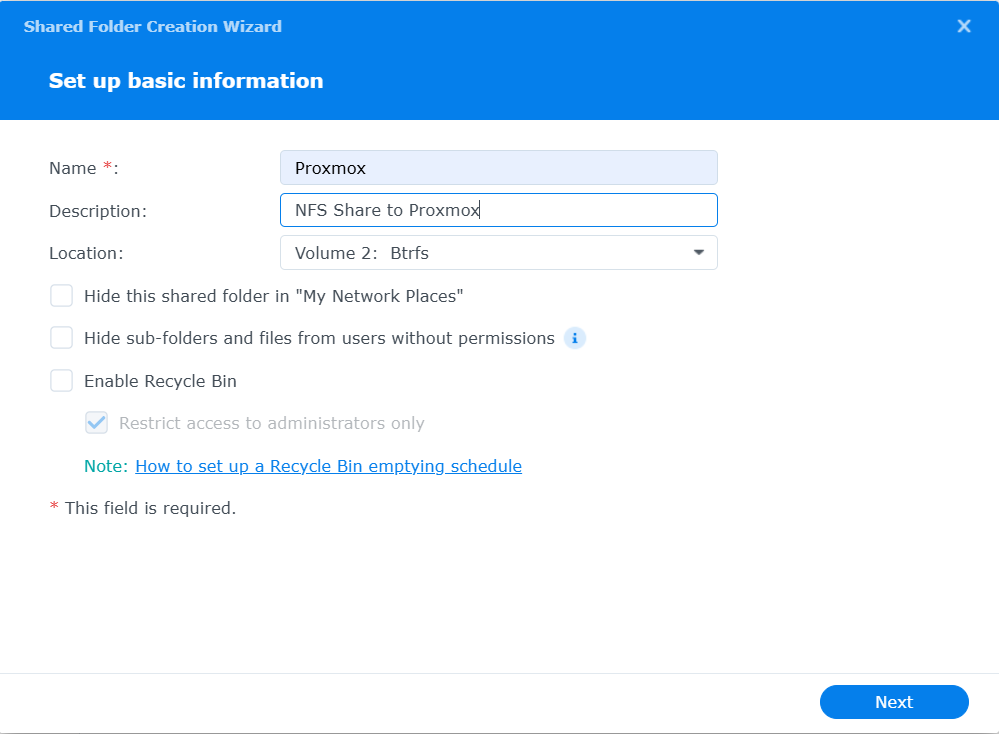
1.4. Create a Shared Folder
- Go to Shared Folder under File Services.
- Click Create to set up a new shared folder. Follow the wizard to define the folder name, location, and permissions.
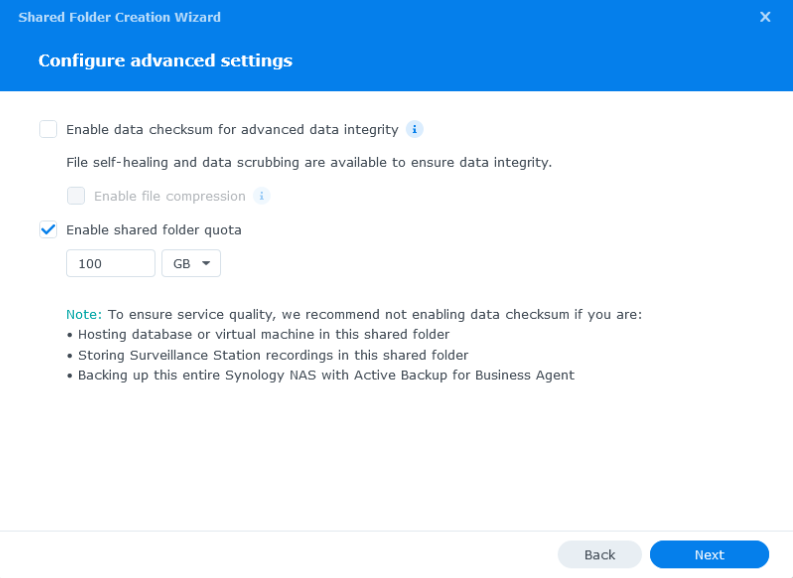
- Configure the shared folder quota if you want to limit backup capacity
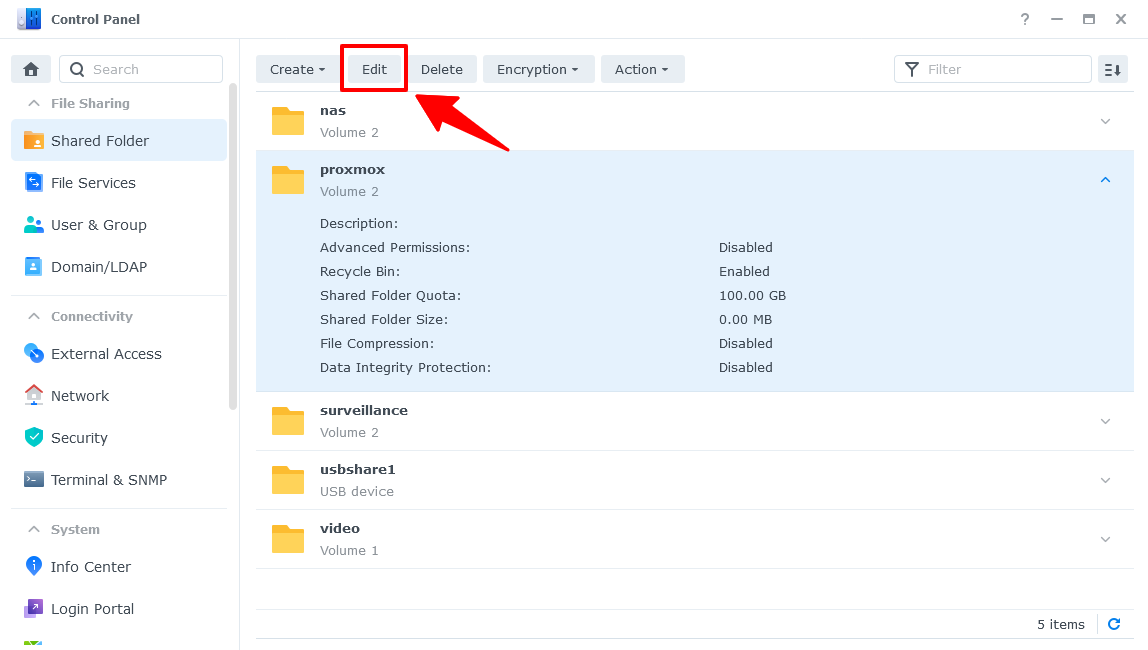
1.5. Configure NFS Permissions
- After creating the shared folder, select it from the list and click Edit.
- Go to the Permissions tab, and then click on NFS Permissions.
- Click Create to add a new NFS rule.
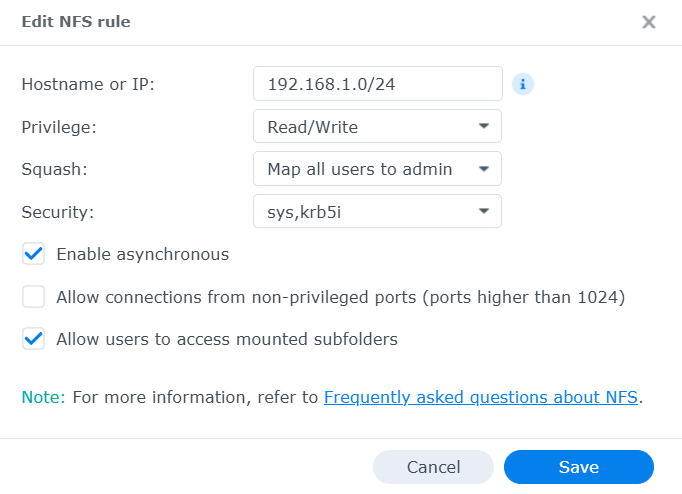
- In the NFS rule setup, specify the following:
- Hostname or IP: Enter the IP address of your Proxmox server or use
*for all. - Privilege: Set to Read/Write (or Read-only if you only need read access).
- Squash: Select the appropriate option (usually Map all users to admin). If you do not select 'Map all users to admin' for the Squash option, you will encounter a 'Permission' error when backing up LXC containers on Proxmox.
- Security: Configure as needed (default is often sufficient).
- Hostname or IP: Enter the IP address of your Proxmox server or use
- Click OK to apply the settings.
2. Mount the NFS Share on Proxmox
2.1. Log into Proxmox Web Interface
- Open your web browser and log into the Proxmox VE web interface.
2.2. Access Node Configuration
- Select the Proxmox node where you want to mount the NFS share.
- Go to the Datacenter view and then to the Storage tab.
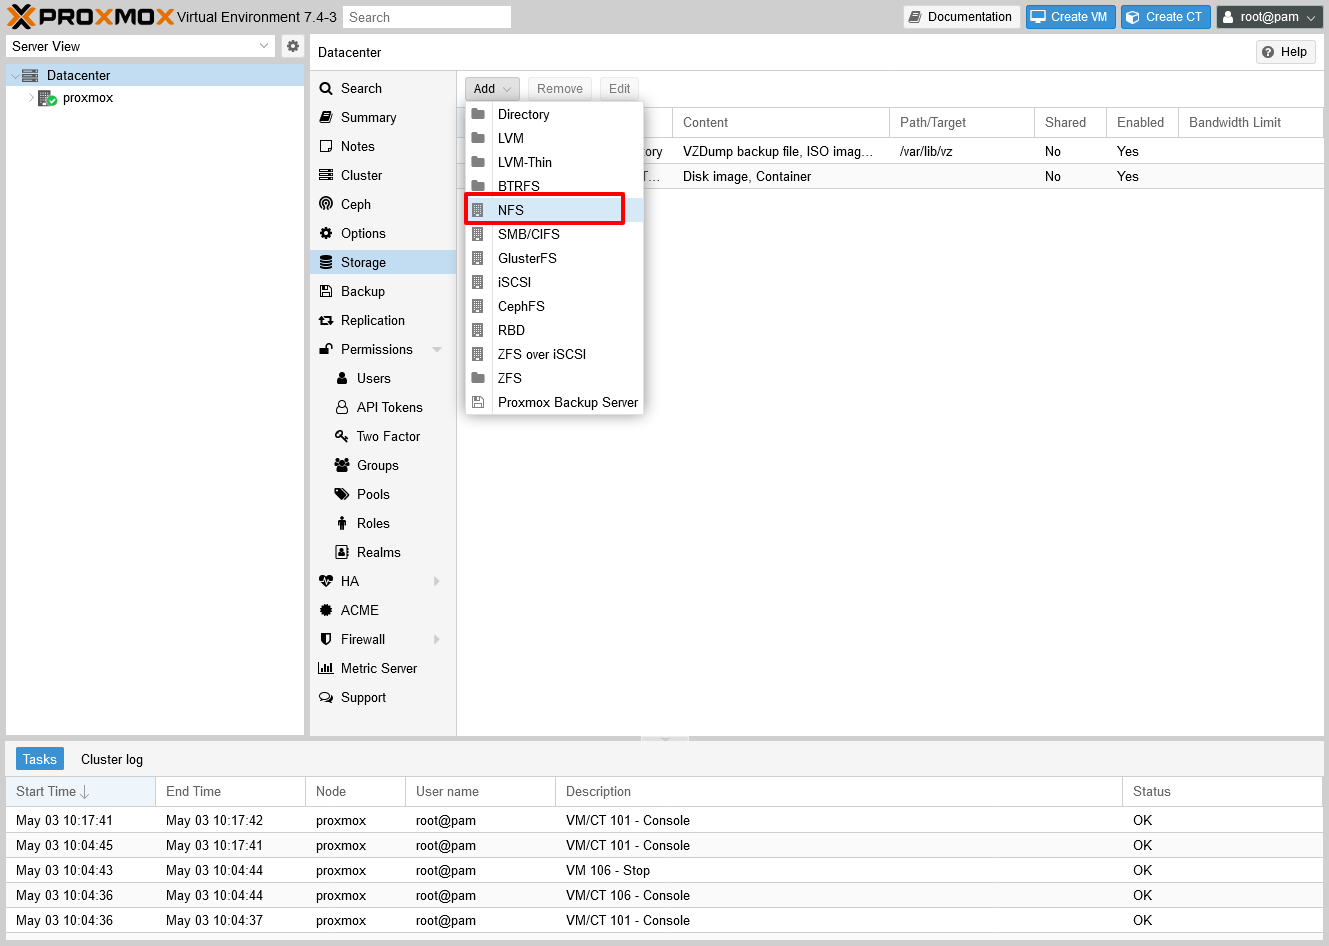
2.3. Add NFS Storage
- Click Add and select NFS.
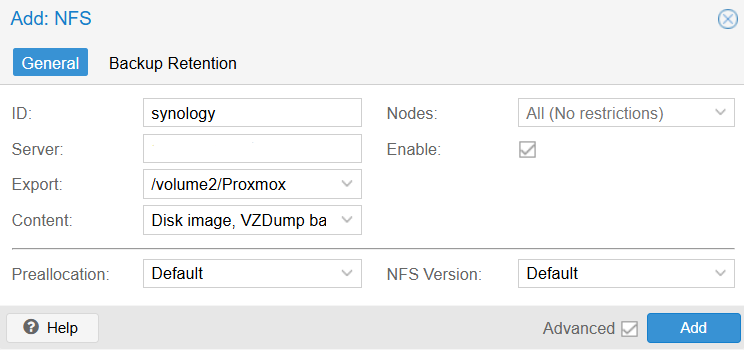
- Fill in the NFS configuration details:
- ID: Enter a unique name for the storage.
- Server: Enter the IP address or hostname of your Synology NAS.
- Export: Enter the path of the shared folder created on Synology (e.g.,
/volume2/proxmox). - Content: Check the boxes for the types of content you want to store (e.g., VZDump backup file).
- Nodes: Select the nodes that should have access to this storage.
- Click Add to save the configuration.
3. Configure Backup Job
3.1. Go to Proxmox Backup Configuration
- In the Proxmox web interface, navigate to Datacenter and then to Backup.
3.2. Create a Backup Job
- Click Add to create a new backup job.
- Configure the job settings:
- ID: Enter a name for the backup job.
- Storage: Select the NFS storage you configured earlier.
- Schedule: Set the schedule for automatic backups.
- Compression: Choose the compression method if required.
- Retention: Configure how long backups should be retained.
3.3. Specify VM and Backup Options
- Choose the VMs to be backed up.
- Configure additional options as needed, such as backup mode (snapshot, stop, or suspend).
4. Verify and Monitor
4.1. Run Backup Job Manually
- To test the configuration, you can run the backup job manually from the backup configuration screen.
4.2. Monitor Backup Jobs
- Check the status of backup jobs and ensure that they are running successfully.
- Monitor logs and storage space to ensure everything is working as expected.
Troubleshooting
- Connection Issues: Ensure that the Proxmox server can reach the Synology NAS over the network and that there are no firewall rules blocking NFS traffic.
- Permissions Issues: Double-check NFS permissions on the Synology DSM and ensure that the Proxmox server IP has the correct access rights.
By following these steps, you should be able to successfully set up an NFS share on Synology DSM and use it for backing up Proxmox virtual machines.


