How to Install AdGuard Home on OpenMediaVault Using openmediavault-compose
In this guide, we’ll walk you through the steps to install AdGuard Home on OpenMediaVault (OMV) using openmediavault-compose.

AdGuard Home is a comprehensive network-wide software that blocks ads and tracking services, enhancing privacy and security for all devices connected to a network. It operates as a DNS server, filtering out unwanted content before it reaches your devices, similar to a local version of a public DNS service like AdGuard DNS.
Here's a brief overview:
- Ad-Blocking: AdGuard Home blocks ads across all devices on your network, including smartphones, tablets, and smart TVs. This is especially useful for devices where traditional ad blockers may not work as effectively.
- Privacy Protection: By blocking tracking scripts and analytics systems, AdGuard Home prevents third parties from collecting your data, offering a higher level of privacy.
- DNS-Based Filtering: As a DNS server, AdGuard Home filters requests at the network level. This means that ads and trackers are blocked before they even reach your devices, reducing the amount of data downloaded and speeding up your internet connection.
- Customizability: Users can create custom filters, blocklists, and allowlists to tailor the blocking to their needs. It also supports parental control features, allowing users to block access to adult content.
- Open Source: AdGuard Home is open-source, allowing users to inspect the code, contribute to its development, and ensure that it operates transparently.
- Cross-Platform: It can be installed on various devices, including Raspberry Pi, Linux, Windows, macOS, and even in Docker containers, making it highly versatile.
In summary, AdGuard Home provides a robust, customizable, and privacy-focused solution for blocking ads and tracking across your entire home network.
In this guide, we’ll walk you through the steps to install AdGuard Home on OpenMediaVault (OMV) using openmediavault-compose. This setup will help you manage your network’s DNS and block ads efficiently.
Prerequisites
- OpenMediaVault installed and running
- openmediavault-compose plugin installed
- Basic understanding of Docker and networking
Step 1: Create a MacVLAN Network
First, we need to create a MacVLAN network for the AdGuard container. This allows the container to have its own IP address, making it easier to manage ports.
- Access OMV Compose Plugin: Go to the OMV web interface and navigate to the openmediavault-compose plugin.
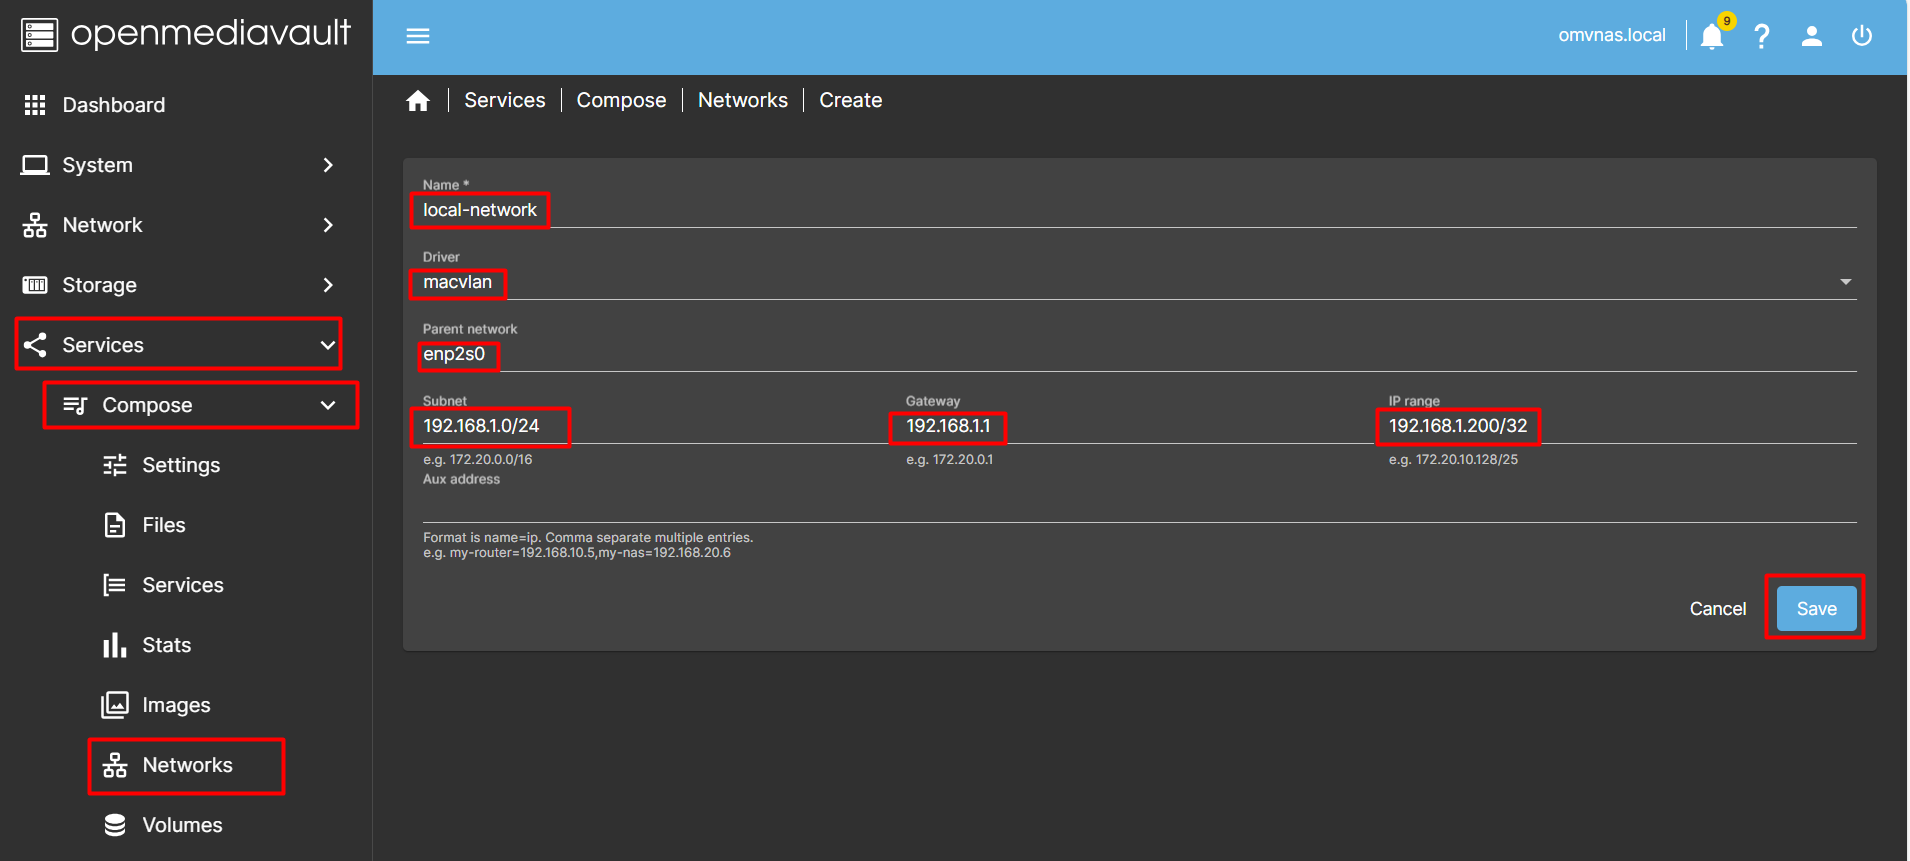
- Create Network: Under the “Services -> Compose -> Networks” tab, create a new network. Name it
local-network. - Configure Network:
- Driver: select macvlan.
- Parent Network: Select your main network interface, in my case it is enp2s0.
- Subnet: Enter your subnet (e.g.,
192.168.1.0/24). - Gateway: Enter your gateway (e.g.,
192.168.1.1). - IP range: Enter your expected IP for Adguard Home (e.g.,
192.168.1.200/32). - Click Save.
Step 2: Create Docker Compose File
Now, we’ll create a Docker Compose file to configure and run the AdGuard Home container.
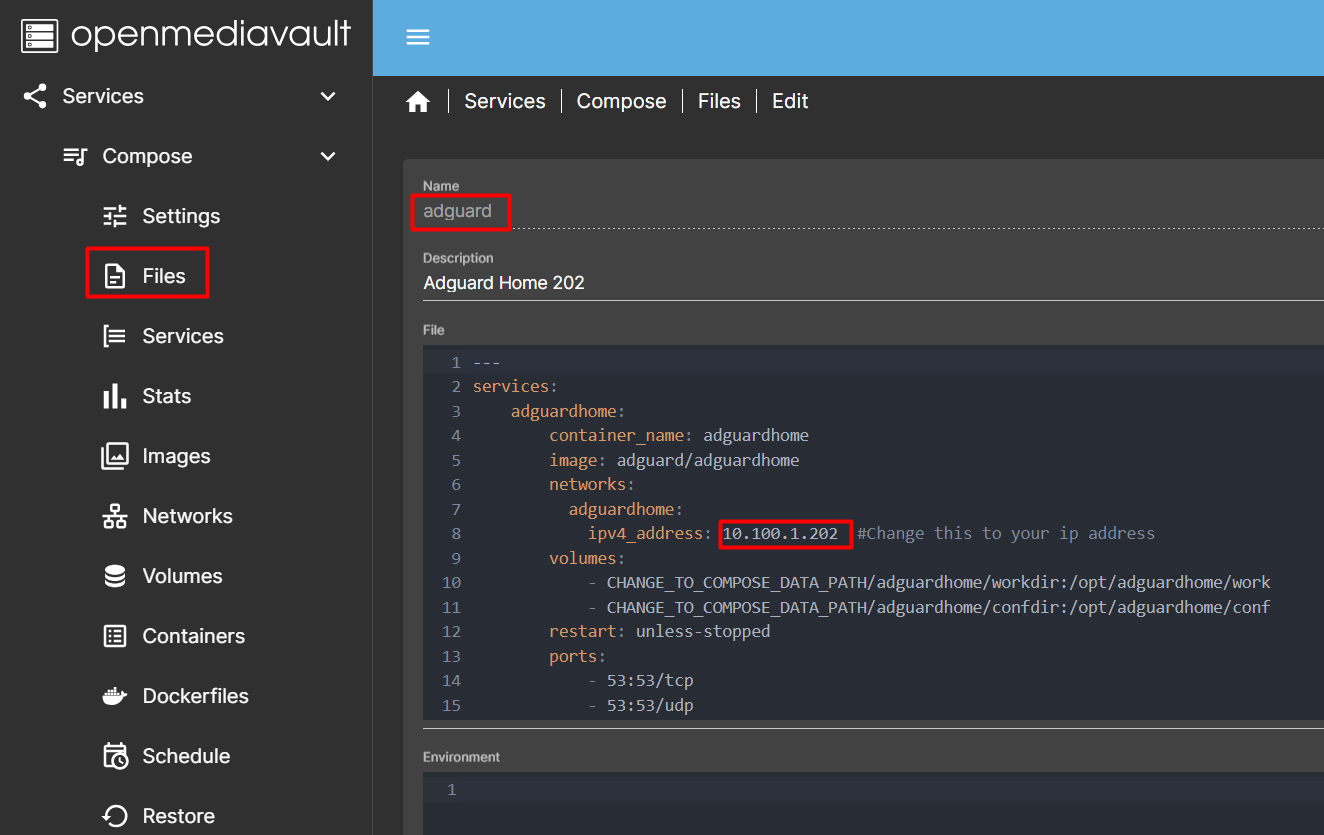
- Create Compose File: Go to Services -> Compose -> Files, create a new compose file and name it
adguard. - Add Configuration: Paste the following configuration into the compose file. Remember to change the
ipv4_addressto match your network configuration. Then click Save.
---
services:
    adguardhome:
        container_name: adguardhome
        image: adguard/adguardhome
        networks:
          adguardhome:
            ipv4_address: 192.168.1.200  #Change this to your ip address
        volumes:
            - CHANGE_TO_COMPOSE_DATA_PATH/adguardhome/workdir:/opt/adguardhome/work
            - CHANGE_TO_COMPOSE_DATA_PATH/adguardhome/confdir:/opt/adguardhome/conf
        restart: unless-stopped
        ports:
            - 53:53/tcp
            - 53:53/udp
            - 67:67/udp
            - 68:68/udp
            - 80:80/tcp
            - 443:443/tcp
            - 443:443/udp
            - 3000:3000/tcp
            - 853:853/tcp
            - 784:784/udp
            - 853:853/udp
            - 8853:8853/udp
            - 5443:5443/tcp
            - 5443:5443/udp
networks:
   adguardhome:
      name: local-network  #This is the name of our macvlan
      external: true
Step 3: Deploy AdGuard Home
Deploy the AdGuard Home container using the compose file.
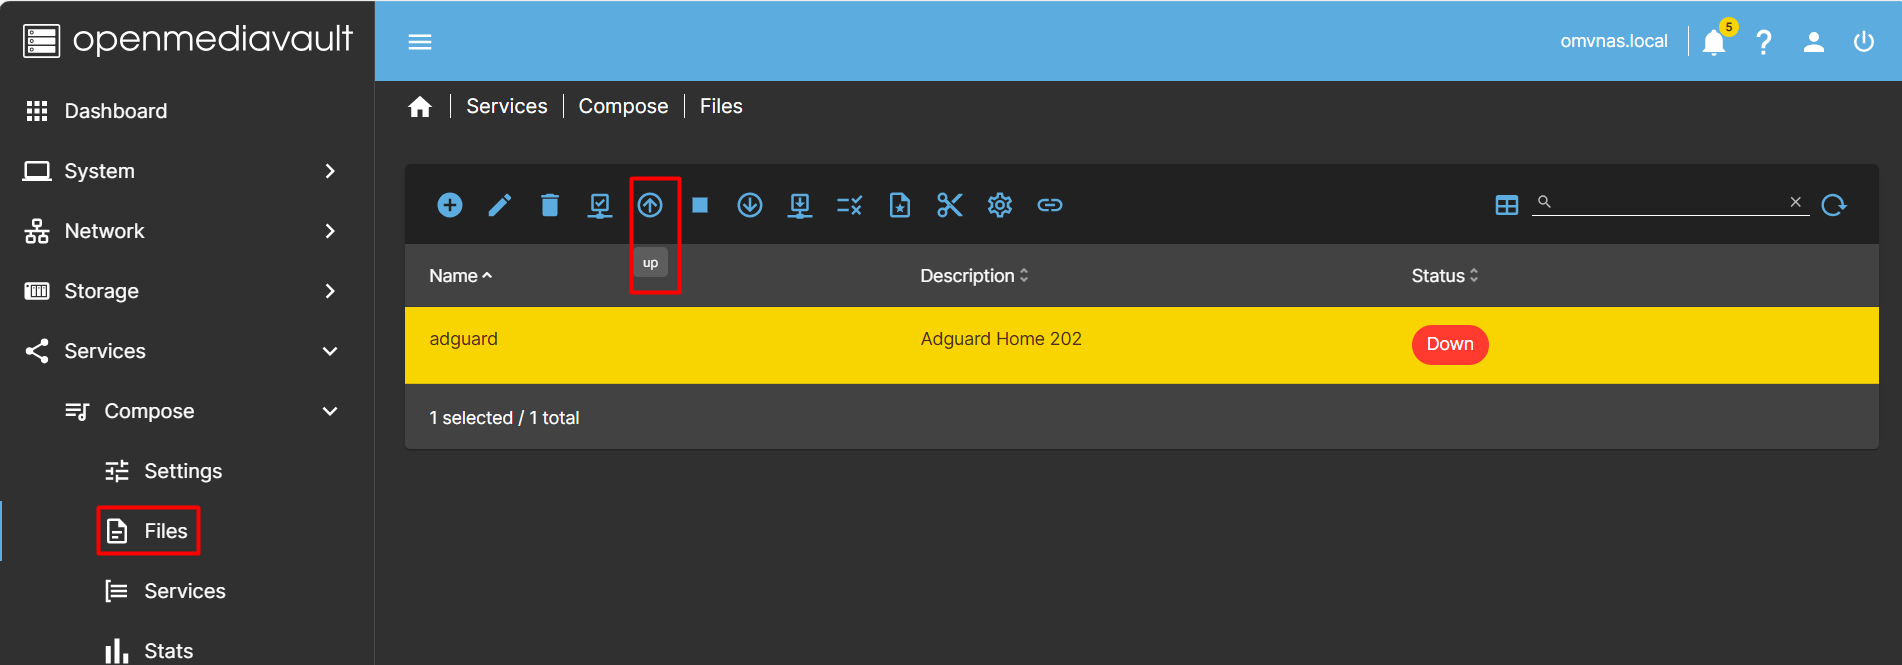
- Deploy Container: In the openmediavault-compose plugin, select the
adguardcompose file and click “Up”. - Verify Deployment: Ensure the container is running and accessible.

Step 4: Configure AdGuard Home
Finally, configure AdGuard Home through its web interface.
- Access Web Interface: Open a web browser and go to
http://192.168.1.200:3000. - Initial Setup: Follow the on-screen instructions to complete the initial setup.
- Set DNS Server: Point your router’s DNS settings to the AdGuard Home IP address (e.g.,
192.168.1.200).
Conclusion
Congratulations! You’ve successfully installed and configured AdGuard Home on OpenMediaVault using openmediavault-compose. This setup will help you manage your network’s DNS and block ads effectively.
Feel free to customize this blog post to better fit your style and audience! If you have any questions or need further assistance, let me know.


